Keenetic Proxy Setup: How to Route Selected Traffic Through a Mobile IP — Step-by-Step Guide
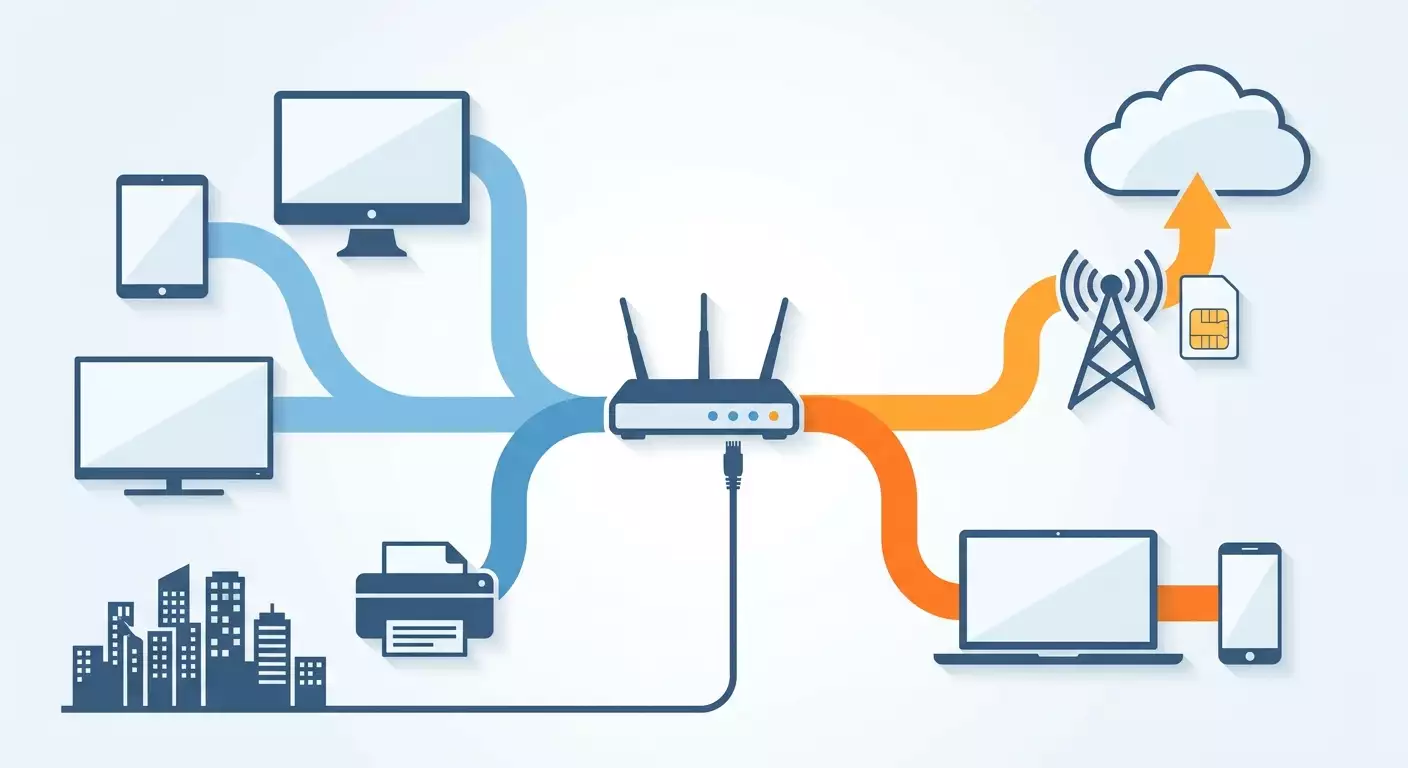
Table of contents
- Introduction: what you'll end up with
- Preliminary prep: tools, access, and a backup
- Core concepts: what's happening inside the router
- Step 1: get your mobile proxy details and test them from your computer
- Step 2: install the proxy client component in keeneticos
- Step 3: create a connection to the mobile proxy server
- Step 4: set up an access policy and bind devices
- Step 5: granular routing — only selected sites through the mobile ip
- Step 6: changing the mobile ip and working with multiple channels
- Verifying the result: full checklist
- Common mistakes and solutions
- Advanced options for power users
- Faq: common questions about setting up a proxy on keenetic
- Conclusion
Introduction: What You'll End Up With
Picture this: an office with a single Keenetic router, connected to marketers' laptops, an arbitrage specialist's work PC, and a couple of test phones. Some devices should go online as usual, through the office ISP, while a few selected ones should go out through a mobile carrier IP. That's exactly the setup we're going to build in this guide.
Once you've completed all the steps, you'll have a Keenetic router that decides on its own whose traffic to send through the mobile proxy and whose to send directly. No browser extensions, no manually entering proxies in each app's settings. A device just connects to Wi-Fi and automatically works through the mobile IP.
This is a step-by-step guide to setting up a proxy on Keenetic for those who've never dabbled in routing or access policies before. We'll be working with a specific firmware — KeeneticOS version 4.x, current as of 2026 — and the built-in Proxy Client component. Other router manufacturers and alternative firmware aren't covered here: they have different logic, different menus, and different pitfalls.
Who This Guide Is For
- Marketers and SMM specialists who need a dedicated work laptop to always go online through a mobile IP.
- Arbitrage specialists using multiple devices who want to split them across different channels without configuring each one manually.
- Developers and testers checking how a service behaves for mobile carrier users.
- Owners of small teams who want centralized access management instead of trusting each employee to configure things themselves.
What You Need to Know Beforehand
Almost no prior knowledge is required. You just need to be able to open the router's web interface in a browser and enter a username and password. We'll explain all the terms — interface, access policy, SOCKS5 — in plain language as we go. If you've ever changed your Wi-Fi password on a Keenetic, you'll manage just fine.
How Much Time It Takes
Pure setup time is 40–60 minutes for a beginner. Of that, about ten minutes goes to installing the component and rebooting the router, another ten to testing the proxy from your computer, and the rest to creating the connection, policy, and running tests. The advanced section with additional scenarios adds another 20–30 minutes, but it's optional.
Preliminary Prep: Tools, Access, and a Backup
Before changing anything in the settings, let's gather everything we need. This is a boring but important stage: half the problems when setting up a proxy on Keenetic come from starting without the necessary data at hand and then getting confused.
What You'll Need
- A Keenetic router running KeeneticOS 4.0 or newer. Most recent models work: Keenetic Giga, Ultra, Hero, Viva, Skipper, Sprinter, Hopper, and others. Older models on KeeneticOS 3.x may not have the Proxy Client component — in that case, check for an available update first.
- Administrator access to the router's web interface. It usually opens at my.keenetic.net or 192.168.1.1. The default username is admin, and the password is whatever you set during initial setup.
- An active internet connection on the router. The component is downloaded from Keenetic's servers, so you can't install it without internet.
- Your mobile proxy details: server address, port, username, and password. If you work with mobileproxy.space, all of this is in your dashboard on the card for the proxy you purchased. The IP change link is there too — you'll need it in step six.
- A computer or laptop connected to this router via Wi-Fi or cable. That's what we'll configure and test from.
- A second device for control, like a phone. It'll stay on the regular channel so you can clearly see the difference between direct traffic and traffic through the mobile IP.
System Requirements
The Proxy Client component doesn't take up much space, but the router's flash memory isn't infinite. If you have lots of extra components installed (a torrent client, a file server, several IPTV modules, for example), you may need to remove something. The router will warn you about insufficient space when selecting components. RAM usage for the proxy client is negligible.
Creating a Backup
Be sure to save your current router configuration. If something goes wrong during the process, you'll restore everything in two minutes instead of setting up Wi-Fi and internet from scratch.
- Open the Keenetic web interface in your browser.
- In the left menu, select Management, then General settings.
- Scroll down to the Backup and restore block (in some versions it's called System files).
- Next to the startup-config file, click the save button. The browser will download a text file with your current configuration.
- Rename the file clearly, like keenetic-config-before-proxy, and store it somewhere safe.
Tip: Make a second copy once everything works. Then you'll have two states: the original and the working one. It's convenient to switch between them when experimenting.
Warning: the startup-config file contains passwords and network parameters in plain text. Don't send it in chats or store it in shared folders. If you need to show the config to a colleague, redact the sensitive lines.
Core Concepts: What's Happening Inside the Router
To avoid performing the steps mechanically, let's go over a few concepts. There are only five, and each takes a paragraph or two to explain.
Mobile Proxy and Mobile IP
A mobile proxy is an intermediary server backed by a real carrier SIM card. When your traffic passes through it, websites see an IP address from the mobile carrier's pool rather than your home or office ISP's address. These addresses are constantly redistributed among subscribers, so they're treated more leniently than server IPs. IP changes happen on demand through a special link or on a timer.
HTTP and SOCKS5
These are two ways to communicate with a proxy server. HTTP proxy was originally built for web traffic and handles browser requests. SOCKS5 is a more universal protocol: it forwards any TCP connection without looking inside. For router-based routing, SOCKS5 is preferable because it will pass not only websites but also messengers, email clients, and phone apps. Mobileproxy.space provides both options on the same channel, usually on different ports.
Proxy Client in KeeneticOS
Routers used to be unable to go through a proxy on their own: setting up a proxy on Keenetic required installing third-party software. KeeneticOS 4.x introduced a built-in Proxy Client component. It creates a separate connection (interface) in the system that looks to the router like just another internet channel. Anything sent to this interface gets packaged by the router and forwarded to the proxy server.
Internet Access Policy
Normally, a router has one path out — the ISP. When there are multiple paths (ISP and proxy), you need a rule for which path to use for which device. In KeeneticOS, this rule is called an access policy. You create a policy, tell it to use only the proxy connection, and bind the devices you want to it. Anything not bound goes by the default policy, i.e., directly.
Static Route
A more granular tool. If you want only requests to a specific site or address range to go through the mobile IP instead of entire devices, you use a route: network such-and-such — through interface such-and-such. This lets a single laptop access work services via the mobile IP while everything else goes directly.
What's important to understand before starting: the proxy client only forwards TCP traffic. Video calls, online games, and some UDP-based protocols won't work through HTTP or SOCKS5. For marketing tasks, websites, social media, and ad accounts, this isn't an issue — almost everything there is TCP.
Step 1: Get Your Mobile Proxy Details and Test Them from Your Computer
Goal of this stage: confirm the proxy is alive, the username and password are correct, and see exactly which IP it hands out. Testing is always easier on a computer than on the router: if something's wrong, you'll see a clear error right away.
Gathering the Parameters
- Log into your mobileproxy.space dashboard.
- Open your proxy list and select the channel you need.
- Write down four values: host (server address, like name.mobileproxy.space or an IP address), SOCKS5 port, HTTP port, username, and password. Five values if you count both ports.
- Find and copy the IP change link. You'll need it later; for now, just save it in your notes.
- Check the authorization type. If the channel has IP-based authorization enabled, switch to username and password. The reason is simple: your home ISP IP changes, and IP-based authorization will one day stop working without warning.
Testing the Proxy from Your Computer
The easiest way is the command line. Open it: on Windows, press Win+R, type cmd, and hit Enter; on macOS, open Terminal. Enter the command with your own details:
curl -x socks5://USERNAME:PASSWORD@HOST:PORT https://api.ipify.orgIf everything's correct, you'll get an IP address back. It should differ from your regular one. Then test the HTTP port with the same command, replacing socks5:// with http:// and the port with the HTTP port. Both should return the same mobile address.
An alternative without the command line: in your browser, open your system proxy settings (Windows: Settings, Network & Internet, Proxy) and temporarily enter the HTTP proxy. On the first request, the browser will ask for your username and password. Visit any IP-check service and note the result. After testing, be sure to disable the system proxy, otherwise you won't be able to tell later whether the router or the computer's settings are doing the work.
Tip: Write down the mobile IP and the carrier name. In later steps, you'll compare results against it and immediately see whether the traffic is routing correctly through the router.
Check: the curl command returned an IP different from your home one, both via SOCKS5 and via HTTP. No errors like 407 Proxy Authentication Required or Connection refused.
Possible Issues
- Error 407 — wrong username or password. Copy them fresh from the dashboard and make sure you didn't grab an extra space.
- Connection refused or timeout — wrong port or host. Make sure you didn't mix up the SOCKS5 port with the HTTP port.
- Your regular IP is returned — curl didn't use the proxy. Check the syntax: the -x parameter goes before the proxy address.
Step 2: Install the Proxy Client Component in KeeneticOS
Goal of this stage: add the module that creates proxy connections to the firmware. Without it, the required menu item simply won't appear in the interface.
Checking the Firmware Version
- Open the Keenetic web interface.
- On the System monitor home page, find the system information block. The KeeneticOS version is listed there.
- If the version starts with 4 — great, move on. If it starts with 3 — go to Management, General settings, and in the updates block click Check for updates. Install the available version and come back to this step after the reboot.
Updating takes 3–7 minutes. During this time, the router is unavailable and the internet drops for the whole network. Warn your colleagues if you're doing this during work hours.
Adding the Component
- Go to Management, then General settings.
- Find the Updates and components block and click Change component set.
- A list of components grouped by category will open. Expand the Network functions category (or use the search field at the top, typing "proxy").
- Find the Proxy client item. It may have a brief description nearby: connecting to the network via an HTTP or SOCKS5 proxy server.
- Check the box next to it.
- Note the used space indicator at the bottom of the page. If it turned red, uncheck unneeded components, like modules you've never used.
- Click Install update or Apply — the name depends on the interface version.
- The router will download the component and reboot. Wait until the indicator lights stop blinking and the page opens again. This usually takes 2–4 minutes.
Warning: don't unplug the router during component installation. An interrupted write to flash memory can leave you needing to recover the device via emergency boot mode.
Tip: while the router reboots, open the proxy dashboard in a nearby browser tab. The data for the next step will be right in front of you, and you won't lose momentum.
Check: after the reboot, open the Internet section, then Other connections. A new Proxy servers block (or Proxy connections) with an add button should appear on the page. If the block is there, the component was installed correctly.
Possible Issues
- Component isn't in the list. Most likely the firmware is older than 4.0 or the model doesn't support the component. Check for updates again or verify your model's support in Keenetic's documentation.
- Not enough space. Disable unused components. Candidates for removal: print server, DLNA, torrent client, extra interface languages.
- The router didn't come back after rebooting. Wait another five minutes. If the interface still won't open, try accessing it at 192.168.1.1 instead of my.keenetic.net.
Step 3: Create a Connection to the Mobile Proxy Server
Goal of this stage: register your mobile proxy in the router as a separate connection and make sure the router can reach it.
Filling Out the Connection Form
- Open Internet, then Other connections.
- In the Proxy servers block, click Add connection.
- A form will open. In the Connection name field, enter a clear name like Mobile IP Verizon or Proxy Arbitrage. It'll appear in interface lists, so make it recognizable.
- In the Type (or Protocol) dropdown, select SOCKS5. If that option isn't available, select HTTP — the difference is minor for web tasks.
- In the Server address field, paste the host from your dashboard. No socks5:// prefixes and no port — just the name or IP.
- In the Port field, enter the port matching the selected type. For SOCKS5 — the SOCKS5 port, for HTTP — the HTTP port. This is the most common mistake spot, so double-check.
- Fill in Username and Password with the proxy credentials.
- Find the Use for internet access toggle. Leave it off. If you enable it, the router will add the connection to the general channel queue, and it could start being used for all devices — which we don't want. We'll manage this through the policy.
- Leave the Automatic connection (or Enable) toggle on.
- Click Save.
Checking the Status
After saving, the connection will appear in the list. Its status is shown next to it. After 10–20 seconds it should become Connected, and the internal interface address may appear in the row. If the status stays as Connecting or Error for a long time, open the connection again and check the port and credentials.
You can also take a look at the System monitor. At the top of the page, in the connections block, the new proxy connection is displayed alongside the main ISP channel. This is handy for quick future diagnostics: one glance shows whether the connection is alive.
Tip: if you have multiple mobile proxies (channels from different carriers, for instance), create a separate connection for each one right now. Name them by carrier and purpose. Later you'll be able to distribute devices across them with policies.
Check: in the connection list, your proxy is marked with a green indicator or Connected status. It appears in the System monitor's interface list. No device is going through it yet — that's normal; the next step is all about that.
Possible Issues
- Authorization error status. The router got a response from the server, but the username or password didn't match. Copy them again. Characters that look similar (lowercase l and the number 1) are often confused when typing manually.
- No response status. Wrong host or port, or the router's primary internet is down. Make sure the ISP channel works — the proxy connects through it.
- The connection keeps reconnecting. Possibly IP-based authorization is enabled on the proxy side and your external address doesn't match. Switch to username and password.
Step 4: Set Up an Access Policy and Bind Devices
Goal of this stage: tell the router which devices go through the mobile IP and which go directly. This is where routing part of the traffic through a proxy on Keenetic takes shape.
Creating a Policy
- Open the Internet section, then Connection priorities. In newer KeeneticOS builds, it may be called Internet access policies and located under Network rules.
- You'll see the default policy with a list of all the router's connections ranked by priority. Don't touch it.
- Click Add policy.
- In the Name field, enter something like Via mobile IP.
- A list of available connections with toggles appears below. Enable only your proxy connection. Leave the ISP channel and everything else disabled.
- Note: some interface versions let you choose what to do if the policy's only connection becomes unavailable. If that option exists, decide for yourself: leave devices without internet until the proxy recovers (safer for multi-accounting) or switch them to the main channel (more convenient for everyday work). For work accounts, we recommend the first option.
- Click Save.
Why enable only the proxy? If you leave the ISP channel as the second in the policy, the router will switch the device to direct at the slightest hiccup in the proxy. For marketing tasks, that's dangerous: the account will suddenly show up with your real IP.
Binding Devices
- Right on the policy page, find the device binding block. It lists all registered network clients with their names and MAC addresses.
- Find the laptop or phone you need. If the name is unclear, check its MAC address in the device's network settings and compare.
- Drag the device into your new policy or select it in the dropdown next to the device — the method depends on the interface version.
- Repeat for each device that should work through the mobile IP.
- Changes apply immediately, without a reboot.
Alternative path: My networks and Wi-Fi, then Device list. Click on the device to open its card. It has an Access policy field — select the created policy and save. This method is more convenient when you have many devices and edit them one by one.
Warning: a device bound to a policy must be registered. Unregistered clients (without a pinned entry in the list) may fall back to the default policy after reconnecting to Wi-Fi. In the device card, click Register and preferably assign it a permanent IP address.
Tip: rename the bound devices so the name contains the word Proxy or Mobile. For example, Laptop Olga MOB. A month later you won't remember who's where — it'll all be visible in the list.
First Test
On the bound device, open a browser and visit any IP-check service. You should see the mobile address you noted in the first step, or another address from the same carrier pool. On the control phone, which you didn't bind, open the same service — it should show the regular ISP IP. If that's the case, congratulations — you've achieved the main result.
Check: the bound device shows the mobile IP, the unbound one shows the ISP IP. In the System monitor, traffic appears on the proxy connection graph when you browse pages from the bound device.
Possible Issues
- Bound device shows the regular IP. Check that the ISP channel is really disabled in the policy. Then reconnect the device to Wi-Fi to refresh the rules.
- Bound device has no internet. The proxy connection dropped or UDP traffic is blocked. Open a regular HTTPS site — if it loads but a messenger doesn't, it's a UDP issue.
- The policy isn't in the list when binding. You didn't save it. Go back to Connection priorities and make sure the policy is created.
Step 5: Granular Routing — Only Selected Sites Through the Mobile IP
Goal of this stage: learn to route not an entire device through the proxy but requests to specific addresses. This is a more flexible scenario: an employee works with ad accounts via the mobile IP while video calls and cloud documents go directly and don't eat up mobile channel traffic.
When You Need This
- The mobile proxy plan has limited traffic and you need to save it.
- Work services and heavy background tasks share one device.
- You need only a specific tool that accesses a known server to go through the mobile IP.
Identifying Destination Addresses
The router routes by IP addresses, not site names. So first let's find out the IP of the service you need. On your computer's command line, enter:
nslookup example.comYou'll get one or more addresses. Large services have dozens of them, and they change, so it's better to use entire subnets for those. Providers publish subnet information in open registries, or you can take an address and add a /24 mask, covering 256 neighboring addresses.
Adding a Route
- Open Network rules, then Routing.
- Click Add route.
- In the Route type field, select Route to network if you want to cover a subnet, or Route to host for a single address.
- Enter the Destination network address, e.g., 203.0.113.0, and the Subnet mask 255.255.255.0.
- In the Interface field, expand the list and select your proxy connection. It appears under the name you gave it in step three.
- Leave the Gateway field empty — it isn't required for a proxy interface.
- Check the Add automatically box so the route is restored after a reboot.
- Click Save.
This route works for all devices on the default policy. Devices bound to the policy from step four are already going entirely through the proxy.
Combined Setup
You can combine both approaches. For example, the arbitrage specialist's laptop is entirely on the mobile IP, while other employees go directly but with granular routes for a couple of work services. The router calmly combines policies and static routes: the device policy is checked first, then the routing table within it.
Tip: keep a list of added routes in a separate document with a note about which service each is for. Six months later, a service's IP addresses may change, and you'll need to understand exactly what to update.
Check: from an unbound device, the IP-check service shows the ISP address, while requests to the site whose subnet was added to routes go through the proxy. To verify this, add the IP-check service's own subnet to the routes: it'll start showing the mobile address.
Possible Issues
- The route isn't applying. The service uses other addresses that aren't in your subnet. Run nslookup several times and collect all variants.
- Part of the page loads directly. The site's static assets and API live on other domains and IPs. Add their subnets too.
- The route disappeared after a reboot. The automatic add checkbox wasn't checked.
Step 6: Changing the Mobile IP and Working with Multiple Channels
Goal of this stage: learn to change IP on demand without touching router settings and prepare a setup for multiple proxies.
Changing IP via a Link
Mobile proxies have a feature that makes them convenient: the address changes without reconfiguring anything. In the mobileproxy.space dashboard, each channel has a link for changing the IP. Just open it in a browser — the carrier issues a new address, and the router won't even notice: the connection to the proxy server stays the same, only the external address on the carrier side changes.
- Copy the IP change link from your dashboard.
- Open it in a browser from any device, even one not bound to the policy. The server will respond with a confirmation.
- Wait 5–15 seconds.
- On the bound device, refresh the IP-check service page — the address has changed.
The link can also be called from scripts: the same curl command without the -x parameter. This opens the way to automatic rotation on a schedule, which we'll cover in the advanced section.
Timer-Based Rotation
If automatic IP changes every few minutes are enabled in the channel settings, you don't need to do anything extra on the router. Devices will keep working; active HTTPS sessions may briefly re-establish — that's normal. For tasks with long sessions (downloading large files, long forms), it's better to disable auto-change and switch the address manually between tasks.
Multiple Mobile Proxies on One Router
The setup scales easily. Each mobile proxy gets its own connection (step 3) and its own policy (step 4). Then devices are distributed across policies. For example:
- Policy Carrier A — two team laptops on one project.
- Policy Carrier B — a test phone and a second laptop.
- Default policy — all other office equipment.
Each device in its own policy sees only its own mobile IP. There's no overlap, and services don't link accounts from different groups by a shared address.
Warning: all devices in a single policy share one mobile IP at any given moment. If your task requires each device to have a unique address, allocate a separate channel and separate policy for each. One channel for several accounts of the same service is a risk you're accepting consciously.
Tip: bookmark the IP change link in your computer's browser with a clear name. One click — a new address. It's faster than opening the dashboard each time.
Check: after opening the IP change link, the address on the bound device has changed, while the proxy connection status in the router stayed Connected and didn't require reconnecting.
Verifying the Result: Full Checklist
Go through the list. Every item should pass. If any of them doesn't, go back to the corresponding step — section references are in parentheses.
Checklist
- In the Other connections section, there's a proxy connection with Connected status (step 3).
- A policy is created with only the proxy connection enabled (step 4).
- The required devices are registered and bound to this policy (step 4).
- The bound device shows the mobile IP on the IP-check service (step 4).
- The unbound device shows the ISP IP (step 4).
- After opening the IP change link, the address on the bound device changes (step 6).
- Settings survive a router reboot: after Management, Reboot, everything works the same (all steps).
- A backup of the working configuration has been made (prep).
How to Test Deeper
- Leak test. On the bound device, open several different IP-check services, including ones that show your IP via WebRTC. They should all show the mobile address or no data. If even one shows the ISP IP, traffic is bypassing the proxy somewhere, usually through UDP.
- App test. On the bound phone, open the apps you plan to work with: social media, ad accounts, messengers. Make sure they load. UDP-based apps (video calls) may not work — that's expected.
- Stability test. Leave the bound device running for 30–60 minutes. Then check the System monitor for any proxy connection drops. The traffic graph should have no long gaps.
- Reboot test. Reboot the router and five minutes later repeat the IP check on both devices.
Success Indicators
Success looks like this: you connect a new device to Wi-Fi, bind it to the policy in two clicks — and it immediately works through the mobile IP. None of the users configure anything on their side. Changing the address takes seconds, and the separation between channels is strict and predictable. That's exactly what a working proxy setup on Keenetic looks like.
Common Mistakes and Solutions
We've collected the problems most often encountered when setting up a proxy on Keenetic. The format: problem, cause, solution.
Device Is Bound but the IP Stays the ISP's
Cause: the ISP channel is enabled in the policy alongside the proxy, and the router picks it as the higher priority. Or the device isn't registered and fell back to the default policy after reconnecting.
Solution: open the policy and disable all connections except the proxy. Register the device in the Device list, pin the IP. Reconnect the device to Wi-Fi.
Proxy Connection Shows an Authorization Error
Cause: a typo in the username or password, or IP-based authorization is enabled on the channel and the router's external address isn't on the whitelist.
Solution: copy the credentials fresh from your dashboard. In the channel settings, choose username and password authorization. Re-save the connection on the router.
Sites Load but Messengers or Calls Don't Work
Cause: the proxy client only passes TCP. Voice and video calls use UDP.
Solution: this is a technology limitation. For devices where calls matter, use granular routing (step 5): work services through the proxy, everything else directly. Or dedicate a separate device on the default policy for calls.
After a Router Reboot, the Proxy Won't Come Up
Cause: the proxy connection starts before the ISP channel gets an address, and the first attempt fails. Or automatic connection startup is disabled.
Solution: make sure the automatic connection toggle is on. Wait two to three minutes — the router retries. If it doesn't help, open the connection and re-save it without changes.
Some Traffic Leaks Past the Proxy
Cause: a fallback channel is enabled in the policy, or the test shows your IP through WebRTC over UDP.
Solution: remove the fallback channel from the policy. For critical tasks, disable WebRTC in the browser or use an anti-detect browser that handles this itself.
Speed Through the Proxy Is Noticeably Lower
Cause: a mobile channel is inherently slower than wired and depends on base station load. Plus, the router spends resources packaging traffic.
Solution: don't push heavy traffic through the proxy — updates, video, cloud backups. Use granular routing so only work services go through the mobile IP. Test the proxy speed itself from your computer via curl to separate channel limitations from router issues.
The Device Disappeared from the List When Binding
Cause: the device hasn't connected in a while and the router removed it from active, or it's connected to a guest network that doesn't participate in policies.
Solution: connect the device to the main Wi-Fi network and register it. The guest segment isn't suitable for these tasks.
Not Enough Space to Install the Component
Cause: flash memory is filled with other components.
Solution: in the component set, uncheck unused modules. Most often these are file and media services. After installing the proxy client, you can bring them back if space allows.
Advanced Options for Power Users
The basic setup covers most tasks. Below are a few directions that extend it. Each requires a bit more confidence in working with the router.
A Separate Wi-Fi Network for the Mobile IP
Instead of binding devices one by one, you can create a network segment with its own Wi-Fi and assign the policy to the whole segment. Any device connecting to that network automatically goes through the proxy.
- Open My networks and Wi-Fi, then Segments (or Home network and then add segment).
- Click Add segment, give it a name like Mobile, and enable a Wi-Fi access point for it with a separate name and password.
- In the segment settings, find the Access policy field and select the policy you created.
- Save. Now the office has two networks: the regular one and the one that outputs through the mobile IP.
This is handy for teams: just tell a new employee the password for the right network, and there's no administrative hassle.
Automatic IP Changes on a Schedule via Entware
If your Keenetic has a USB port, you can install the Entware package environment on a flash drive and run commands on a schedule. This lets the router trigger the IP change link itself, for example every 30 minutes during work hours.
- Install the Open package support (OPKG) component via the component set.
- Prepare a flash drive with an ext4 partition and install Entware following Keenetic's official instructions — the process takes about 15 minutes.
- Connect to the router via SSH and install the curl and cron packages with opkg install curl cron.
- Add a line to crontab like: 0,30 9-19 * * 1-5 curl -s 'IP_CHANGE_LINK' — this triggers a change every half hour from 9 to 19 on weekdays.
- Restart cron and verify the IP changes on schedule.
Keep in mind that Entware runs separately from the main KeeneticOS system and doesn't affect the built-in proxy client. Firmware updates won't break Entware, but it doesn't hurt to check that the schedule works after each update.
Checking Status from the Router's Command Line
KeeneticOS has its own command-line interface, accessible via Telnet or SSH when the corresponding component is enabled. The show interface command with your proxy interface name will display its status, uptime, and traffic counters. This is useful when you need to quickly tell if the channel is alive without opening the web interface. The show running-config command outputs the entire current configuration, where you can find your proxy connection section and confirm the parameters are saved.
Channel Down Notifications
In Management, Diagnostics, and Notifications, you can set up event delivery by email or via the Keenetic mobile app. Enable notifications for connection state changes. When the proxy goes down, you'll know before employees start writing that the internet is broken.
Time-Based Splitting
Schedules in KeeneticOS let you turn connections on and off by the clock. If the mobile proxy is only needed during work hours, set a schedule for the proxy connection: on from 9 to 20, off at night. Devices on a policy without a fallback channel will be without internet during that time — which may be the desired behavior for work accounts that shouldn't show activity at night.
Optimization
- Assign permanent IP addresses to bound devices — this way rules apply more reliably.
- Disable automatic system and app updates on bound devices during work hours so they don't clog the mobile channel.
- Regularly review the proxy connection's traffic graph in the System monitor: abnormal spikes will point to the device that's pulling extra data.
FAQ: Common Questions About Setting Up a Proxy on Keenetic
Can I set up a proxy on Keenetic without installing additional components?
No. The stock KeeneticOS doesn't include a proxy client; you need to add it via the component set. This takes a few minutes and requires nothing but internet access and free flash memory space.
What should I choose — HTTP or SOCKS5?
SOCKS5, if it's available in your firmware version and from your proxy provider. It passes any TCP traffic, not just web. HTTP will do if you work exclusively with a browser and ad accounts.
Will apps on my phone work, not just the browser?
Yes, as long as they use TCP. Social media, text messengers, email, ad accounts work. Voice and video calls using UDP won't go through the proxy client.
How many devices can I bind to a single policy?
There's practically no technical limit. But remember: they all share one mobile IP. For multi-accounting, it's sensible to keep one device per channel or carefully separate accounts across different groups.
Do I need to change anything on the devices themselves?
Nothing. That's the whole point of the setup: the device just connects to Wi-Fi, and the router handles routing. Just make sure the system proxy isn't left enabled on the device after the first step's tests.
What happens if the mobile proxy is temporarily unavailable?
It depends on the policy. If it only has the proxy connection, bound devices stay without internet until it recovers. If a fallback channel is added, they switch to it but expose the real IP. For work accounts, we recommend the first option.
Can I use IP-based authorization instead of username and password?
You can, but it's not recommended. The router's external address assigned by the ISP periodically changes, and IP-based authorization will stop working at an unexpected moment. Username and password are more stable.
Does this setup affect the speed of regular devices?
No. Devices on the default policy go directly, as before. The proxy client only loads the router's CPU with the traffic that actually goes through it.
How quickly can I revert everything?
Two ways. Quick: unbind devices from the policy and delete the proxy connection. Full: restore the saved startup-config via Management, General settings, restore block. The router will reboot to its original state.
Will a firmware update break the setup?
As a rule, no: connections, policies, and routes are preserved. After an update, run through the checklist from the verification section — this takes five minutes and gives you peace of mind.
Conclusion
Let's sum up. You've installed the Proxy Client component in KeeneticOS, created a connection to the mobile proxy, built an access policy, and bound the necessary devices to it. Additionally, you've learned granular routing by address, how to change the mobile IP with one click, and how to scale the setup to multiple channels. All of this — without installing anything on the end devices.
The main advantage of this approach is manageability. The setup lives in one place, on the router. New devices connect in a minute. A human error at a workstation won't lead to a real IP leak because routing isn't managed by the user — it's managed by you.
What to Do Next
- Make a backup of the working configuration and label it with the date.
- Monitor the proxy connection's stability for a few days via the System monitor.
- If the team grows, move to the separate Wi-Fi segment option from the advanced section — it eliminates manual binding.
- Set up connection state notifications so you're the first to know about failures.
Where to Go from Here
The next level is automation: scheduled IP rotation via Entware, different channels for different projects, integrating IP change links into your work scripts. Another direction is pairing the router with anti-detect browsers: the router provides the mobile IP at the network level, the browser provides unique fingerprints at the profile level. Together they give much more reliable isolation than either tool alone.
If something didn't work the first time — that's normal. Go back to the checklist, find the step where the result didn't match expectations, and go through it again. The setup is simple and reliable, and once you've done it, you'll be able to replicate a proxy setup on Keenetic for any new router in fifteen minutes.