How to Conduct Geo A/B Testing of Ads and Search Results via Mobile Proxies: A Step-by-Step Guide
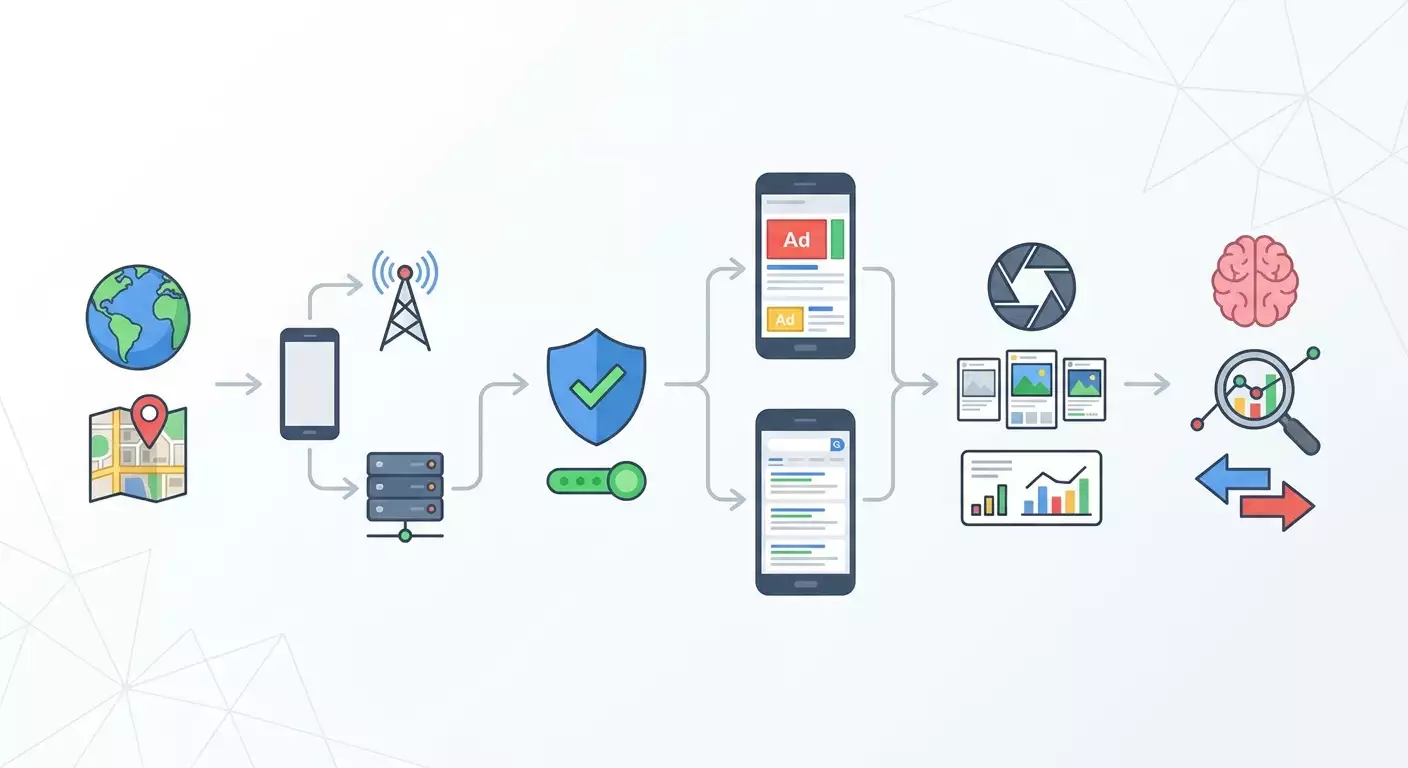
Table of contents
- Introduction
- Preliminary preparation
- Basic concepts
- Step 1: define goals and hypotheses for geo testing
- Step 2: understand how mobile proxies provide the right geography
- Step 3: set up pools by country and city
- Step 4: prepare test infrastructure — browser, tracking, and protocol
- Step 5: run geo a/b tests for ads, serps, and localization
- Step 6: automate rotation, logging, and quality control
- Checking the result
- Common mistakes and solutions
- Additional possibilities
- Faq
- Conclusion
Introduction
You’re holding a practical step-by-step guide that will take you from zero to confidently running geo A/B tests of ads, search engine results pages (SERPs), and localization elements using mobile proxies. We’ll dive into why geo testing is needed, how to get the right geography via mobile IPs, set up pools by country and city, plan scenarios, run experiments, collect clean data, and make decisions without mistakes.
What you’ll get in the end: a clear system of actions, ready checklists, templates for scenarios and checks, infrastructure setup instructions, and a set of common mistakes with ways to avoid them. You’ll be able to independently run a correct comparison of creatives, landing pages, ads, extensions, bids, and interface elements across different geos. As a result, you’ll optimize conversions and cost per lead, and improve the local relevance of your search SEO snippet and content.
Who this guide is for: marketing and advertising specialists, SEO analysts, product managers, small business owners, localization specialists, and budding data analysts. The material suits beginners but also includes sections with advanced techniques for those looking to automate processes and build sustainable testing pipelines.
What you need to know beforehand: basic ad and SEO terminology (ad, creative, CTR, conversion, SERP), A/B testing principles (control, variant, hypothesis), and some experience working with a browser. No deep technical networking knowledge is required—we’ll explain all critical points in plain language.
How much time it takes: with a manual approach, a basic launch across 2–3 locations takes 2–4 hours; a full cycle with multiple scenarios and checks takes 1–2 days. Automation may add another 1–3 days, but then pays off many times over.
Preliminary Preparation
Before starting, let’s gather tools and set up your environment. This way you’ll avoid bottlenecks and rework.
Necessary Tools, Programs, and Access
- A modern browser: Google Chrome, Microsoft Edge, or Mozilla Firefox. Any of them works for basic tests.
- A text editor or Google Sheets to record scenarios, checklists, and results.
- Access to ad systems (if needed): Google Ads, Yandex Ads, or another platform where you run A/B tests. Make sure you have rights to view statistics and adjust campaigns.
- A tool for working with proxies: the mobile proxy provider’s dashboard (e.g., services like MobileProxy.space) and, if needed, a local proxy manager or the browser’s built-in settings.
- Screen capture tools: standard OS screenshot tools or a browser extension. Screenshots help confirm differences in ads and SERPs.
- For working with data: a spreadsheet editor for collecting metrics and charts.
System Requirements
- Operating system: Windows 10/11, macOS 12+, or Linux with a modern browser.
- A stable internet connection with at least 10–20 Mbps for comfortable work and loading images/videos in creatives.
- Free disk space: at least 2 GB for temporary files, logs, and screenshots.
What to Download, Install, and Set Up
- Update your browser to the latest version. Go to Settings → About and click Update.
- Prepare a working folder for the test. Create a folder named “GeoABTest_City_Date”.
- Create a spreadsheet file called “Test_Plan” with sheets: “Scenarios”, “Sessions”, “Results”, “Artifacts” (links to screenshots).
- Get access to the mobile proxy provider’s dashboard. Ensure the countries and cities you plan to test are available. For examples, we’ll use wording and typical options you find in services like mobileproxy.space.
- Prepare accounts for your ad systems and analytics (if you need to change campaigns and track conversions).
Creating Backups
- Export campaign settings before making changes. Most ad systems allow export to CSV or Google Sheets.
- Make a copy of the “Test_Plan” file and enable version control in it.
- Save a list of active proxies and their parameters (country, city, port, login, password) in a separate “Proxies” sheet.
✅ Check: by now you have access to the mobile proxy dashboard, created the “Test_Plan” file, and updated your browser. You can list target countries and cities in the table.
⚠️ Note: Use mobile proxies only for lawful purposes: ad testing, relevance checks, content localization, monitoring your own resources. Do not use them to bypass legal restrictions or violate platform terms of service.
Basic Concepts
Key Terms Simply Explained
- Geo A/B test — comparing two or more variants (A, B, sometimes C) of ads, pages, or interfaces across different geographies to see what works better.
- Mobile proxy — an intermediate server that routes your traffic through a mobile network (3G/4G/5G). Sites and platforms see the mobile operator’s IP from the desired country and city.
- IP rotation — changing the external mobile IP at set intervals or manually to simulate different real users and avoid artificial restrictions.
- SERP — search engine results page for a query: list of links, snippets, maps, ad blocks.
- GeoIP — detecting a user’s presumed geography by their IP address. See more in the GeoIP guide.
Core Working Principles
Mobile proxies provide access to IP addresses assigned to real SIM cards in operator networks. This is important: such addresses belong to mobile ASNs and usually match real users from the specified country or even city. This way, you see the results and ads through the eyes of a local user, not via a data center IP that could give distorted results.
Rotation helps collect statistics from multiple IPs in a short time. It lowers the risk of personalization and caching, making observations easier to replicate. But too much rotation can backfire if the platform starts showing captchas or limiting request frequency. Balance is key.
What to Understand Before Starting
- The goal and success metric must be defined before you start. For example: ad CTR, cost per lead, scroll depth, SERP position.
- Act within platform rules and the law. Do not impersonate to break site rules, create fake activity, or emulate clicks on competitor ads.
- Keep conditions identical for variants. Change only one variable at a time so that results are interpretable.
Step 1: Define Goals and Hypotheses for Geo Testing
Goal of this stage: pin down exactly what and why you’re testing across countries and cities, to avoid scope creep and incorrect conclusions.
Step-by-Step Instructions
- Open the “Scenarios” sheet in your “Test_Plan” file.
- Create a table with columns: “Scenario ID”, “Goal”, “Hypothesis”, “Metric(s)”, “Geography”, “Start”, “End”, “Success Criteria”.
- Define a business goal. Example: “Increase the banner CTR in Warsaw by 15% compared to Prague.”
- Formulate a hypothesis. Example: “A Polish-language headline will increase CTR in PL relative to the English version.”
- Choose metrics. Example: CTR, CPC, CR, ad position, visit depth, bounce rate.
- Assign test geographies: country and specific cities. Example: Poland — Warsaw; Czech Republic — Prague.
- Define the winning criterion. Example: “CTR difference ≥ +15% at 95% confidence.”
- Set experiment duration. For instance, 7 days with at least 300 impressions per variant in each location.
Important Points
Consistent environment: test on the same days of the week and similar hours to avoid seasonality and time spikes.
Clean variable: change only one parameter: headline language, price, currency, image.
Expected Result and Check
You have 1–3 scenarios with clear goals, hypotheses, and metrics for specific countries and cities. All fields in the “Scenarios” table are filled.
✅ Check: you can verbally explain to a colleague which hypothesis you’re testing and what counts as a winning variant.
Possible Problems and Solutions
- Problem: vague goals. Cause: overly broad wording. Solution: rewrite the goal in the format “increase/decrease [metric] by X% in [location] over [period]”.
- Problem: too few metrics. Cause: focusing only on CTR. Solution: add supporting metrics: CPC, CR, cost per action.
Step 2: Understand How Mobile Proxies Provide the Right Geography
Goal of this stage: choose a provider and proxy modes that genuinely match the target country and city, and set up basic parameters.
Step-by-Step Instructions
- Log into your mobile proxy provider’s dashboard. As a reference, look at functionality like that of mobileproxy.space.
- Open the location selection section. Filter by country. Check which cities or regions are available within the country.
- Look at the IP type: mobile (ASN of a mobile operator). Make sure it’s not data center.
- Check the rotation mode: by time (every N minutes), on demand (a button in the dashboard), or via API (for automation).
- Record in the “Proxies” sheet: country, city, operator, port, login/password, rotation mode, limits.
- If there’s a protocol choice, start with HTTP(s). Use SOCKS5 only if you have special scripts or parsers.
- Create one test proxy for each target location (city). Don’t start with dozens—first verify the geography is correct.
Important Points
Geographic accuracy: not all providers guarantee city-level accuracy; sometimes only region is available. Confirm in the dashboard.
Usage policy: work within platform terms of service and the law. Test your own campaigns and results; don’t mislead users.
Tip: On first connection, take a screenshot of the IP info by searching “what is my IP” in your browser. Attach the file link in the “Artifacts” sheet to verify the location.
Expected Result and Check
You have working data for 1–3 mobile proxies on target locations and have entered their parameters in the table. You confirm the location via GeoIP and operator.
✅ Check: when you search “my IP” in a search engine, you see the country and, if available, the city matching your selection. A screenshot is saved.
Possible Problems and Solutions
- Problem: country is correct but city doesn’t match. Cause: the provider only offers regional accuracy. Solution: choose another provider or a guaranteed city, or account for this limitation in the protocol.
- Problem: too many captchas. Cause: aggressive rotation. Solution: increase the rotation interval to 10–15 minutes or switch to manual IP changes between series of actions.
Step 3: Set Up Pools by Country and City
Goal of this stage: prepare manageable sets of proxies by location to test quickly and reproducibly.
Step-by-Step Instructions
- In the provider’s dashboard, create “pools” or saved proxy sets: one pool per country, and separate pools for cities where available.
- Name pools clearly: “PL_Warsaw_Mob”, “CZ_Prague_Mob”.
- For each pool, set the rotation mode. Recommended start: “on demand” or “every 15 minutes”.
- If the dashboard supports “sticking” an IP for a session, enable it for 10–20 minutes for a clean session.
- Export the pool’s connection parameters (host, port, login, password) and paste them into the “Proxies” sheet with the pool ID.
- Create a separate browser profile for each location. In Chrome: Menu → Settings → You → Add profile. Name the profile “PL_Warsaw”, etc.
- For each profile, manually configure the system proxy. In Windows: Settings → Network & Internet → Proxy → Enable → enter host, port, login, and password.
- Turn off account sync in test profiles to avoid personalization.
Important Points
Profile isolation: different locations — different browser profiles and separate cache folders. This reduces “leakage” of personalization between locations.
Tip: In each profile, open a blank “Incognito” or “Private” window to check session cleanliness before each scenario.
Expected Result and Check
Pools are formed for each geography, clean browser profiles are created, and connecting to each pool is easy to turn on/off.
✅ Check: When you switch to the “PL_Warsaw” profile and refresh “my IP”, the country stays PL; when you switch to “CZ_Prague”, it shows CZ. Screenshots are added to “Artifacts”.
Possible Problems and Solutions
- Problem: a profile drags old cookies. Cause: you ran a test in the main profile. Solution: recreate the profile, use private windows and clear cache.
- Problem: proxy fails authentication. Cause: incorrect login/password. Solution: double-check in the provider dashboard and “Proxies” sheet.
Tip: If you regularly test the same cities, save browser launch shortcuts with the proxy parameters or profile already set. This saves 1–2 minutes per launch.
Step 4: Prepare Test Infrastructure — Browser, Tracking, and Protocol
Goal of this stage: standardize how you open pages, check ads or SERPs, capture results and artifacts, so data are comparable.
Step-by-Step Instructions
- In the “Sessions” sheet, create a table with columns: “Session ID”, “Date/Time”, “Location (country/city)”, “Browser Profile”, “IP (screenshot)”, “Scenario ID”, “Step-by-Step Actions”, “Artifacts (links)”, “Notes”.
- Set timing. Example: each session lasts 10–15 minutes, 2–3 sessions per city, morning/afternoon/evening local time.
- Prepare “control queries” for SERPs. Example: “pizza delivery”, “buy sneakers”, “your brand + category”, and 1–2 competitor queries.
- Prepare a “check route” for ads. Example: video service feed, news pages, search results page for target queries, partner sites.
- Define what you record. Example: ad text and language, price, currency, extensions, position in the block, competitor domain, creative format.
- Create folders for screenshots: “PL_Warsaw_YYYYMMDD”, “CZ_Prague_YYYYMMDD”. In each session, add prefixes “SERP_”, “ADS_”, “LP_” (landing page).
- Prepare a “Scenario Report” template with sections: “Hypothesis”, “Metrics”, “Screenshots”, “Observations”, “Risks”, “Conclusion”.
Important Points
Unified protocol: the same route and timing for locations improve comparability of results.
Tip: Record short video clips (GIF or MP4) of scrolling through feeds. Sometimes dynamics matter more than static frames and help defend conclusions in front of colleagues.
Expected Result and Check
You have a session “skeleton”: what to open, in what order, what to record, and where to store artifacts. Folders and tables are ready.
✅ Check: You can run a “dry” session and follow the route without errors, even if no real ads are showing yet.
Possible Problems and Solutions
- Problem: data is messy. Cause: you didn’t prepare a storage structure. Solution: organize folders and add artifact links in the “Sessions” sheet.
- Problem: you forget to capture the same elements. Cause: no checklist. Solution: add a checklist to “Scenarios” and print it out.
⚠️ Note: Do not use test sessions to simulate user activity that affects third-party ad budgets. Your goal is observation and validation of your own hypotheses, not interfering with others’ campaigns.
Step 5: Run Geo A/B Tests for Ads, SERPs, and Localization
Goal of this stage: following the prepared protocol, conduct sessions in the target cities, collect data, and record differences in ads, search results, and localized site elements.
Part A: Ads
- Open the “PL_Warsaw” profile and connect the mobile proxy from the “PL_Warsaw_Mob” pool.
- Search “my IP”, capture a screenshot (country/operator/city if available).
- Go to a search engine and enter a target query. Example: “buy sneakers”.
- Scroll the page. Record ads: headline language, text, price, currency, extensions, displayed domain, position.
- Open a news feed or partner site where you usually see display ads. Capture formats and brands.
- If needed, open your brand’s page and check localization (currency, language, phone number, delivery).
- Repeat steps 2–6 in the “CZ_Prague” profile.
Part B: SERPs
- In each profile, run 3–5 “control” queries from your list.
- Log positions of your site, competitors, presence of local maps, rich snippets, and knowledge panels.
- Take screenshots of the top and bottom of the SERP.
Part C: Localization
- Open landing pages of your campaigns with UTM tags. Example: utm_source=ads&utm_campaign=pl_city_test&utm_content=variantA.
- Check language, currency, local phone numbers, delivery times, local banners, and legal notices.
- Take screenshots of key blocks with obvious differences.
Expected Result and Check
You have collected a set of artifacts for each location: “my IP” screenshot, ads, SERPs, and landing pages. All artifacts are linked to a session ID in the “Sessions” table.
✅ Check: Viewing the “PL_Warsaw_YYYYMMDD” folder and corresponding rows in “Sessions” shows a complete chain: IP confirmation → ad blocks → results → landing pages.
Possible Problems and Solutions
- Problem: ads don’t show. Cause: low impression frequency or time of day. Solution: repeat the check at another time and add 1–2 more sites to the route.
- Problem: SERP is heavily personalized. Cause: leftover cookies or account login. Solution: use a private window and a new profile, clear cache before the session.
Tip: Conduct 2–3 sessions per location at different times. This averages out impression and result variability.
Step 6: Automate Rotation, Logging, and Quality Control
Goal of this stage: remove manual repetition, reduce human error, and speed up test cycles without losing data quality.
Step-by-Step Instructions
- In the provider’s dashboard, enable “on-demand” rotation and keep the “Change IP” button visible. If an API is available, note the key and endpoint.
- Set a rotation interval of 10–20 minutes, or stick to manual changes between scenarios.
- For logging, create a “Rotation_Logs” sheet: “Date/Time”, “Location”, “IP Before”, “IP After”, “Session ID”, “Comment”.
- If using automation via scripts, program IP changes: before a new session starts, and forcibly when captchas increase.
- Add quality checkpoints. For every 3rd session, do a mandatory “my IP” check and compare with the planned location.
- Add a stop rule: if location mismatches are found or a series of 3+ captchas occurs, halt the scenario and investigate.
Important Points
Rotation balance: changing IPs too often can hurt the experience and cause restrictions. Too rarely may increase personalization risk. Start with 10–20 minutes and adjust.
Tip: If some steps always repeat (open SERP, screenshot top 3, go to LP), record a macro or use a checklist with hotkeys to keep sessions within 5–7 minutes.
Expected Result and Check
IP rotation follows clear rules, you record changes and link them to sessions. Data quality is monitored.
✅ Check: The “Rotation_Logs” sheet shows when and why an IP changed, and “Sessions” lets you reconstruct any test step.
Possible Problems and Solutions
- Problem: rotation API is unavailable. Cause: plan or provider. Solution: use button-based rotation and a standard timer.
- Problem: location “drifts”. Cause: operator specifics. Solution: stick the IP to a session or choose a different pool with more stable geography.
Tip: Maintain a separate “Control Cases” sheet with reference screenshots for each location. Before a new series, quickly compare to rule out accidental discrepancies.
Checking the Result
Checklist: What Should Be Working
- Browser profiles for each location exist and launch.
- Mobile proxies connect; location is confirmed.
- The ad and SERP check route is clear and reproducible.
- Screenshots and videos are stored in the right folders; links are entered in “Sessions”.
- IP rotation is controlled; logging is sufficient for auditing.
- Preliminary differences between locations are visible in ads, SERPs, or landing page localization.
How to Test
- Take one scenario and run it completely for two cities.
- Check against the checklist: IP, ads, SERP, LP, artifacts.
- Ask a colleague to repeat the scenario using your document. If they reproduce results without guidance — the documentation is solid.
Success Indicators
- Data is comparable, differences are reproducible, artifacts are complete.
- You can create “before/after” slides for each city and explain the conclusions.
- One session takes no more than 10–15 minutes, location accuracy ≥ 95% by checkpoints.
Tip: Add a “Differences Summary” table to your report with columns “Element”, “PL_Warsaw”, “CZ_Prague”, “Comment” — clarity speeds up decision making.
Common Mistakes and Solutions
- Problem: Confusing artifacts between locations → Cause: identical file/folder names → Solution: name with location and date, use prefixes “SERP_”, “ADS_”, “LP_”.
- Problem: Inconsistent results → Cause: different time slots, seasonality → Solution: run sessions at the same time, duplicate morning/evening and average.
- Problem: Captchas and blocks → Cause: too frequent rotation or high activity intensity → Solution: increase rotation interval, slow down actions, use private windows.
- Problem: Location mismatch → Cause: operator or pool specifics → Solution: stick the IP, change pool, check “my IP” before each session.
- Problem: Test changes multiple variables at once → Cause: weak hypothesis definition → Solution: test one factor at a time, document strictly.
- Problem: Analytics doesn’t confirm conclusions → Cause: insufficient sample size → Solution: extend the test, gather more impressions/clicks to reach statistical significance.
- Problem: Conflicts with platform rules → Cause: actions beyond acceptable testing → Solution: review the protocol, work only within rules and laws.
⚠️ Note: Avoid any actions that could harm third parties or violate ad and search platform rules. This guide is intended for legitimate testing and research of your own ads, content, and localization.
Additional Possibilities
Advanced Settings
- City clusters: collect 3–5 cities in one country and compare regional behavior within the country.
- ASN filtering: if the provider allows, test different mobile operators in the same city.
- Event‑based rotation: change IP after a certain checkpoint, e.g., after capturing a SERP.
Optimizations
- Save time on routine: use saved search queries and a clipboard with template comments.
- Create “city passports”: reference sets of IP screenshots, SERPs, and 2–3 popular sites with ads. Before a test, compare to ensure you’re “in the right city” from the platforms’ perspective.
- Integration with BI: export results to Google Data Studio / Looker Studio for interactive dashboards by city and scenario.
What Else You Can Do
- Localized UX audit: check how understandable pages are to residents of specific cities, watch for hidden incorrect hyphenations or wrong currency format.
- Competitor review: assemble a “gallery” of competitor ads by city to see their local offers and messaging.
- Local feeds and price checks: monitor price consistency and product availability across regions.
Tip: Add “Context” notes to each report: holidays, major sports events, weather anomalies — all affect behavior and impressions.
FAQ
Question 1: What’s better to start with: one country or several at once? Answer: Start with one country and two cities to refine the protocol and assess variability, then scale up.
Question 2: How can I be sure the platform sees me as a local user? Answer: Check “my IP”, compare the operator with locals, verify that the interface language and currency match, and that local blocks load.
Question 3: When is rotation every 5 minutes needed? Answer: Rarely. Usually 10–20 minutes or manual changes between scenarios are enough. Too frequent rotation raises the risk of captchas.
Question 4: Can I use the same IP for all scenarios in a day? Answer: You can stick the IP for a session, but rotate IPs between scenarios to reduce personalization and dependence on a single address.
Question 5: Why are mobile proxies better than data center ones for geo tests? Answer: Mobile IPs belong to telecom operators and are closer to real users. Data center IPs are often detected and give less representative results.
Question 6: How to store results conveniently for the team? Answer: Use a uniform folder structure, a “Sessions” sheet with artifact links, and summary reports in BI. This speeds up collaborative reviews.
Question 7: What if competitor ads “don’t come in”? Answer: Broaden the viewing route, increase the time window, and try several platforms. Consider competitors’ frequency and targeting.
Question 8: Should I disable browser geolocation? Answer: For a clean experiment, it’s safer not to provide explicit geolocation so the platform relies on the IP. Use private windows and don’t grant geolocation access unless it’s part of the test.
Question 9: How do I correlate manual inspection results with metrics in the ad system? Answer: Tag campaigns and variants with UTM parameters by location and scenario. Compare CTR, CR, and cost with what you observe visually.
Question 10: Where can I find a simpler overview of GeoIP basics? Answer: Check our internal guide on terms and checks in the GeoIP guide — it collects basic approaches in one place.
Conclusion
You’ve completed the full journey: from defining goals and hypotheses to setting up mobile proxies by country and city, preparing infrastructure, running sessions, and capturing differences in ads, SERPs, and localization. You’ve learned to control IP rotation, log key events, store artifacts, and produce reproducible reports. This process is now scalable: you can add new cities, scenarios, and data sources without breaking the methodology.
What to do next: automate repetitive steps, strengthen quality checkpoints, connect BI dashboards. Gradually expand geography and depth of checks: operators, peak hours, seasonal patterns. Meanwhile, develop experiments on landing pages — local currency, offers, and content often yield the fastest wins.
Where to go from here: move from manual inspection to a semi-automated pipeline, explore the impact of local events on conversion, build your own libraries of reference creatives and SERP snapshots. Services like mobileproxy.space keep the right geography and stable mobile IPs at hand, and our GeoIP guide refreshes the basics of location determination. You’re on the right track: a clear protocol, clean data, confident conclusions — and a noticeable boost in your campaigns’ effectiveness.