How to Monitor Competitors’ Stock: A Step-by-Step Guide with Telegram and Google Sheets
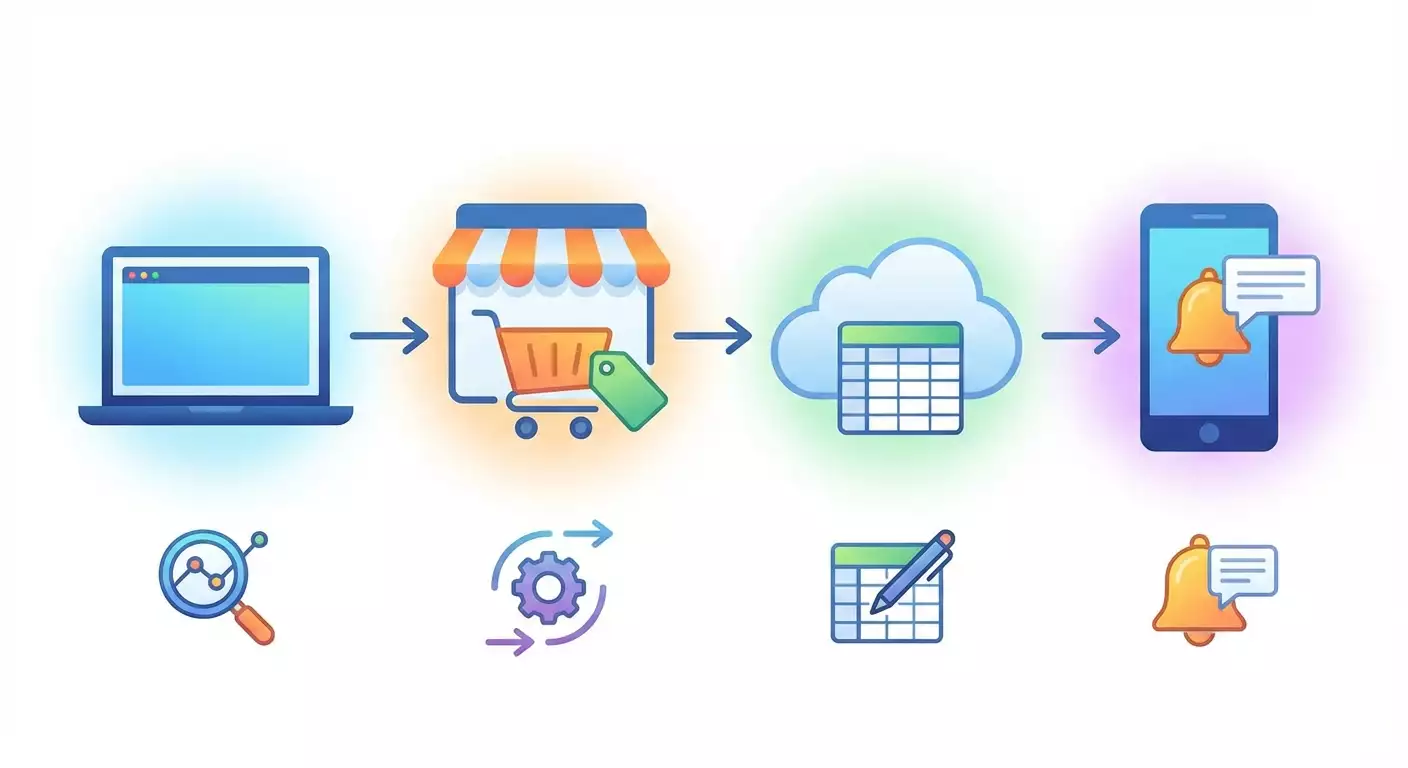
Table of contents
- Introduction
- Pre-flight setup
- Core concepts
- Step 1: planning, compliance check, and collecting target skus
- Step 2: project and environment setup
- Step 3: fetching page data
- Step 4: source configuration and data normalization
- Step 5: telegram notifications
- Step 6: google sheets integration
- Step 7: scheduler and automatic runs
- Step 8: network settings and proxy use without breaking rules
- Step 9: logging, change control, and data quality
- Final verification
- Common mistakes and fixes
- Extras
- Faq
- Conclusion
Introduction
In this step-by-step guide, you’ll build a working system to monitor competitors’ product availability on marketplaces: set up a parser, cleanly process data, send Telegram alerts, and log results to Google Sheets. We’ll walk through every stage—from environment setup to automated scheduling. You’ll end up with a reliable, easy-to-maintain workflow you can extend for your needs.
Who this guide is for: beginner analysts, store owners, product managers, and competitive intelligence specialists. You don’t need coding experience, but attention to detail helps. We’ll explain each action and check step by step.
What you should know beforehand: basic computer skills—installing software, creating folders, using a Google account. Knowing terms like token, API, and HTML is a plus, but we’ll explain them as we go.
How long it takes: environment and service setup 60–120 minutes; parser setup 60–120 minutes; Telegram and Google Sheets integration 30–60 minutes; testing and scheduling 30–60 minutes. Total: 2–6 hours including checks.
Pre-flight setup
Required tools and access: a Windows, macOS, or Linux computer; Python 3.10+; a Telegram account; a Google account with Google Sheets access; access to Google Cloud Console to create a service account; no marketplace accounts required—we only work with public pages within permitted rules.
System requirements: stable internet, 1 GB free disk space, 4 GB RAM, and a modern browser for Google authorization.
What to download and install: the latest stable Python; a text editor (any code editor you like); a task scheduler if needed (Windows already has one; cron is available on macOS and Linux); optionally Playwright for complex dynamic pages—only where allowed by the site’s rules.
Backups: if you’ll store results in user files or existing Google Sheets, make a copy of your sheets first. This lets you roll back in case of mistakes.
⚠️ Attention: We only use data accessible without login and without bypassing any technical restrictions. Follow robots.txt, terms of use, and local laws. This guide is not intended to defeat protections or limitations.
Core concepts
Key terms in plain English: a parser is a program that fetches a page and extracts the bits you need—e.g., stock status; HTML is the markup language of web pages; a CSS selector is a way to point to a page element; an API is a programmatic way to get data when a site provides it; a token is a secret key for API access; cron or a scheduler runs your script on a schedule.
How it all works: you take a list of products and URLs, load each page at a reasonable request rate, find the stock status, normalize it to intuitive values (in stock, out of stock, low stock), record the result, and send a Telegram alert when there’s a meaningful change. Log every action.
What to understand before you start: some marketplaces load data dynamically. If a public static page doesn’t contain what you need, only use permitted mechanisms (e.g., explicit public JSON endpoints intended for public use), or skip that source. Do not bypass protections, do not use CAPTCHA services, and do not mask your identity.
Step 1: Planning, compliance check, and collecting target SKUs
Goal for this step
Decide what you’ll monitor, ensure it’s allowed, and prepare a list of products with URLs.
Step-by-step
- Create a requirements sheet. Write the goal: monitor competitors’ stock to gauge demand and restock your own inventory in time.
- Compile a product list. Start with at least 5–10 items. For each, capture: name, unique product ID (SKU or article), and the full link to the competitor’s product page.
- Check each page manually in your browser. Open in incognito. Make sure the stock status is visible on a regular page load without logging in.
- Open each domain’s robots.txt. Append /robots.txt after the domain. Check for disallow rules targeting product pages. If they’re disallowed, remove that domain from monitoring.
- Review the site’s terms of use. If they forbid automated data extraction, exclude that source.
- Create a sources file named sources.csv. The first line should have headers: id,site,product_name,url,selector_hint. Add rows with your data. In selector_hint, briefly describe where the stock status appears (for example, the block near the Buy button).
Important
Don’t collect data if the site’s rules clearly forbid it. You risk being blocked and violating the law.
Tip: For your first test, pick 3–5 products from different sites and include one with dynamic content to assess complexity early.
Expected result
You have a sources.csv with products and verified links you can analyze without login or bypassing any protections.
Potential issues and fixes
- No stock status on the page: try a different product or site, or check if the status is hidden behind a popup. If it is, it’s best to skip that source.
- Long or messy URLs: that’s fine as long as the page opens without authentication.
✅ Check: Open each link from sources.csv in incognito. You should see the product name and its stock status with your own eyes.
Step 2: Project and environment setup
Goal for this step
Prepare a working folder, install Python libraries, and set up configuration files.
Step-by-step
- Create a project folder named stock-monitor.
- Open a terminal in that folder. On Windows, use Search to open cmd, then cd to the folder. On macOS or Linux, open Terminal and cd to the folder.
- Create a Python virtual environment: python -m venv .venv
- Activate it. On Windows: .venv\Scripts\activate. On macOS and Linux: source .venv/bin/activate. You’ll see (venv) on the left of your prompt.
- Install dependencies: pip install requests beautifulsoup4 lxml tenacity python-dotenv gspread google-auth google-auth-oauthlib google-auth-httplib2
- Optional for dynamic pages (use only where allowed): pip install playwright then playwright install
- Create a .env file for secrets in the project folder. Leave it empty for now; we’ll add tokens later.
- Create folders: data for input/output CSVs, logs for logs, scripts for your code.
- Move sources.csv into data.
Important
Keep tokens and keys only in .env and never put them in public places.
Tip: If you have multiple Python projects, use separate virtual environments to avoid dependency conflicts.
Expected result
You’ve set up the environment with required libraries and folder structure, and sources.csv is in data.
Potential issues and fixes
- Packages won’t install: check your internet and retry. If you get a permissions error, run the terminal as Administrator (Windows) or use sudo on macOS/Linux.
- python command not found: install Python and add it to PATH during setup, or use python3.
✅ Check: Run python -V. You should see the Python version, and your virtual environment should be active in the project directory.
Step 3: Fetching page data
Goal for this step
Safely load HTML pages and extract stock status without bypassing protections, with retries and timeouts.
Step-by-step
- Open your editor and create scripts/fetcher.py.
- Define the strategy: send HTTP requests with an explicit timeout, a clear identifying User-Agent, and a modest, even request rate. This lowers site load and keeps you compliant.
- Implement basic fetching with requests. Set a User-Agent like ProductName-StockMonitor;contact=your_email. Use a 10–20 second timeout. Add retries via tenacity with exponential backoff, up to 3–4 attempts.
- Parse HTML with BeautifulSoup using the lxml parser. For now, just return the parsed page object.
- Status detection: add normalize_status that maps keywords to one of three values: in_stock, out_of_stock, low_stock. Examples: contains Out of stock, Sold out — out_of_stock. Contains In stock, Available — in_stock. Contains Only X left, Low stock, Last units — low_stock.
- Extraction using selector_hint: use selector_hint from sources.csv as a textual hint. Find elements containing phrases like In stock, Out of stock, Only X left. If there are multiple blocks, choose the one next to the Buy or Add to cart button.
- Rate limits: in your main loop, pause 2–5 seconds between requests to the same domain to avoid excessive load.
Important
We do not use protection-bypass techniques. If you cannot get the stock status without running site scripts, honestly skip that source or find official options (e.g., partner APIs).
Tip: Use a clear User-Agent with a contact address. It signals good intent. Sometimes site admins will even suggest a safer integration route.
Expected result
fetcher.py can safely load a page and extract stock status as one of three values—or return None if the status isn’t found or the source isn’t suitable.
Potential issues and fixes
- Endless loading: set an explicit timeout and cap retries.
- Status is an image: without an official API, it’s better to skip such sources.
✅ Check: Run a test call for one page from sources.csv and print the status. You should see in_stock, out_of_stock, or low_stock.
Step 4: Source configuration and data normalization
Goal for this step
Make adding new products and sites code-free: configure everything via CSV and simple rules.
Step-by-step
- Create scripts/config.py. Define dictionaries of keywords by language—for example, keywords for in stock, out of stock, and low stock in both English and any local languages you monitor.
- Add a per-domain map if certain sites use consistent wording. For domains with repeatable layouts, you can specify stable phrases often used in statuses.
- Prepare data/sources.csv. Ensure every row has a unique id. Optionally add a threshold column for low stock if the site shows a numeric value (e.g., Only 3 left) so you can detect low_stock automatically.
- Add scripts/runner.py that reads the CSV, calls the fetcher, normalizes the status, adds a timestamp, and writes to data/results.csv with columns: id, site, product_name, url, status, detail, checked_at.
- Implement per-run caching and throttling: if multiple URLs share a domain, pause between requests and keep at most 1 request every 2–3 seconds per domain.
Important
Don’t write empty statuses to results. If the parser couldn’t find a status, record reason=not_found and review the page manually.
Tip: Add a parser_note column to store a short snippet of the matched text for easier debugging.
Expected result
You can run a single script and get a consistent CSV with results for all sources. Adding a new product is just adding a row to data/sources.csv.
Potential issues and fixes
- Different wording for statuses: expand your keyword dictionary in config.py.
- Site updates its layout: perfectly normal. Note the date the change started and update your rules.
✅ Check: Run the runner and verify that data/results.csv contains entries for all products with status and timestamp.
Step 5: Telegram notifications
Goal for this step
Get instant alerts when stock status changes or hits a critical state.
Step-by-step
- Create a bot. In Telegram, find BotFather. Click Start. Send /newbot. Follow instructions to set a name and unique username. Save the token somewhere safe.
- Add the token to .env as TELEGRAM_BOT_TOKEN=your_token.
- Get your chat_id. Send any message to your bot. Then fetch updates via the Telegram API from your script or a quick test and grab the chat id. Save it in .env as TELEGRAM_CHAT_ID=number.
- Create scripts/notifier.py. Implement send_telegram_message that accepts notification text and sends it via Telegram Bot API. Handle network errors so failures don’t crash your run.
- Wire the notifier into the runner. If the new status differs from the previous one for the same product (compare with the last entry in results.csv or a local JSON log), send a message with a short summary: product name, new status, check time.
- Throttle notifications. If a site flips between states frequently within an hour, cap alerts to no more than once every N minutes per product.
Important
Don’t spam yourself. Only notify on real changes. For stable statuses, logging is enough.
Tip: Add a common prefix like [StockMonitor] so you can easily filter messages in Telegram.
Expected result
When status changes, you receive a clear Telegram message showing the product, site, old and new status, and timestamp.
Potential issues and fixes
- Bot doesn’t message you: make sure you initiated the chat by sending the bot a message first.
- Too many messages: add time-based throttling or filter out minor changes.
✅ Check: Simulate a status change for any product (temporarily override the result) and confirm the alert arrives with the expected text.
Step 6: Google Sheets integration
Goal for this step
Store results in Google Sheets for clear reporting and collaboration.
Step-by-step
- Create an empty Google Sheet named Stock Monitor. On the first sheet, add headers in row 1: id, site, product_name, url, status, detail, checked_at.
- Open Google Cloud Console. Create a project. In APIs, enable Google Sheets API and Google Drive API.
- Create a service account in IAM named stock-monitor-service. Generate a JSON key and download it. Store it in your project, e.g., credentials/service_account.json.
- Share the sheet with the service account email. Open your sheet and grant Editor access.
- Add to .env: GSHEET_KEY_PATH=credentials/service_account.json and GSHEET_SPREADSHEET_NAME=Stock Monitor.
- Create scripts/sheets.py. Implement open_sheet for auth and append_rows for batch inserts. Handle quotas with pauses and retries.
- Wire sheets into the runner. After each run, append new rows or update the latest row per product. Use batch inserts to minimize quota usage.
Important
The service account key is sensitive. Don’t share it in messengers and don’t store it publicly. Always use .env and least-privilege access.
Tip: For resilience, keep a local cache: write to data/results.csv first, then sync to Sheets in batches so you don’t lose data during brief network issues.
Expected result
Monitoring results appear in Google Sheets. You can build filters and pivot tables to compare status trends over time.
Potential issues and fixes
- Permission error: ensure the service account is added to the sheet with Editor rights.
- Quota exceeded: reduce write frequency and use batching.
✅ Check: Run the runner and refresh the sheet. New rows should appear. Verify columns and values.
Step 7: Scheduler and automatic runs
Goal for this step
Run monitoring on a schedule without manual work.
Step-by-step
- Create scripts/main.py to call the runner end-to-end, write results, and send Telegram alerts on changes. Add logging to logs/stock-monitor.log: time, number of processed products, error counts.
- Windows Task Scheduler: open Task Scheduler. Create a basic task named StockMonitor. Trigger: On a schedule (e.g., hourly). Action: Start a program. Point to the Python interpreter in your virtualenv and pass scripts/main.py as the argument. Set the project folder as Start in. Save.
- macOS/Linux cron: open crontab. Add an hourly line that activates the environment and runs main.py. Ensure absolute paths to Python and the project are correct.
- Verify environment variables. Load .env at the start of main.py or set TELEGRAM_BOT_TOKEN and others in the system environment.
- Test the scheduler: temporarily run every 5–10 minutes. Confirm new rows land in the sheet and Telegram alerts arrive on state changes.
Important
Watch your logs. They’re the best source of truth if something breaks overnight.
Tip: Add a max runtime (e.g., 10 minutes) to prevent overlapping runs if a rare hang occurs.
Expected result
Monitoring runs on schedule, records results, and sends alerts when statuses change. Logs reflect stable operations.
Potential issues and fixes
- Script can’t find Python: specify the full path to the interpreter in the scheduler.
- .env not loaded: load .env in main.py or set variables in the system environment.
✅ Check: Open the logs. You should see a timestamped scheduled run and a clean finish. New rows appear in Google Sheets, and Telegram alerts trigger on changes.
Step 8: Network settings and proxy use without breaking rules
Goal for this step
Make your network layer stable and controlled—without violating site terms.
Step-by-step
- Set timeouts. For each request, use sensible values, e.g., 15s connect and 30s read.
- Enable retries with exponential backoff and a time cap. This reduces false network errors without increasing load.
- Use a transparent User-Agent with contact info, e.g., ProductName-StockMonitor;contact=your_email. This improves clarity.
- Use a proxy only if needed. Configure a single corporate or vetted provider to stabilize routing. Set HTTP_PROXY or HTTPS_PROXY in .env. Only use proxies where allowed by the site, law, and your agreements.
- Do not use block-circumvention tactics. No CAPTCHA services, no human-behavior emulation, no browser-masquerading. If a site limits automated access, remove it from monitoring.
- Limit request rate. A good norm is at most 1 request every 2–3 seconds per domain. If your list is large, spread requests out over time.
Important
⚠️ Attention: Mass IP rotation to evade restrictions or blocks is not acceptable. This guide does not include or recommend such practices. Only use legal, agreed data access channels.
Tip: If you need a specific location, consider running your code in a data center in that region instead of rotating IPs. It’s simpler and more transparent.
Expected result
Your requests are stable, respectful to source sites, and compliant with their rules.
Potential issues and fixes
- Intermittent network errors: increase pauses, enable retries, or use a single reliable proxy if needed.
- Requests blocked: check robots.txt and site terms. If automated access is prohibited, remove the source.
✅ Check: Run several monitoring cycles in a row. Network error rate should stay below 1–2%, and average response time should be stable.
Step 9: Logging, change control, and data quality
Goal for this step
Ensure every run leaves an auditable trail and status changes are tracked correctly.
Step-by-step
- Add logs/stock-monitor.log. Log start time, number of URLs, successes and errors, duration, and the list of products with changes.
- Maintain a local last status log in data/last_status.json. Compare new status with the previous one and decide whether to alert.
- Validate inputs. If a row in sources.csv lacks url or id, log the error and skip it.
- Standardize status. Allow only three values: in_stock, out_of_stock, low_stock. Everything else goes into reason and detail.
- Use UTC timestamps to avoid time zone confusion when analyzing in Google Sheets.
Important
Strict typing and input validation prevent rare but painful mistakes.
Tip: Add a quality guard: if the site’s not_found rate exceeds a threshold, send a one-time Telegram warning to review the layout.
Expected result
The system cleanly records each run, all status changes, and any potential data quality anomalies.
Potential issues and fixes
- False positives: require a minimum duration for a new status—e.g., treat it as a change only if it holds for two consecutive runs.
- Growing log files: enable weekly log rotation and keep no more than four archives.
✅ Check: Simulate a status change and verify it appears in last_status.json, triggers an alert, and lands in the sheet.
Final verification
Checklist
- You have a sources.csv with valid links and hints.
- Your Python environment is set up with all dependencies.
- The parser extracts and normalizes the status for each link.
- Google Sheets receives new rows after runs.
- The Telegram bot sends change notifications.
- The scheduler runs the script on time and logs are written.
How to test
- Run the script manually and confirm new rows in the sheet.
- Change one status value in the local log, run again—an alert should arrive.
- Disable internet for a minute and re-enable—confirm retries work and the system recovers.
Success criteria
- More than 95% of page loads succeed.
- Notifications arrive only for real changes.
- Google Sheets data is clean and consistent, with no duplicates.
✅ Check: Build a pivot table in Google Sheets by site and status. You should see a clear distribution and time trend with no empty values.
Common mistakes and fixes
- Issue: empty statuses in results. Cause: no matching keywords found. Fix: expand keyword dictionaries, refine selector_hint, or remove the source.
- Issue: too many alerts. Cause: rapid status flips or noise. Fix: add throttling and require confirmation across two consecutive runs.
- Issue: Google Sheets access errors. Cause: service account lacks permissions. Fix: add the service account to the sheet with Editor access.
- Issue: silent bot. Cause: you didn’t start the chat. Fix: message the bot first and resend.
- Issue: blocked requests. Cause: high frequency or disallowed behavior. Fix: slow down, follow robots.txt and terms; exclude prohibited sources.
- Issue: scheduler doesn’t run the script. Cause: wrong path to Python or script. Fix: use absolute paths and check permissions.
- Issue: growing log files. Cause: no rotation. Fix: enable rotation and keep a limited number of archives.
Extras
Advanced settings
- Per-domain queues to control rate limits separately for each site.
- On-disk page caching with a short TTL to avoid redundant requests within minutes.
- Flexible alert rules: only notify on out_of_stock → in_stock or when low_stock falls below a threshold.
Optimization
- Batch writes to Google Sheets every N minutes instead of per product.
- End-of-run domain-level stats and a brief daily service summary in Telegram.
- Logging levels: INFO for normal flow, WARNING for skips, ERROR for exceptions.
What else you can add
- A Docker container to run the app consistently on a server.
- Visual dashboards in Looker Studio (Data Studio) or similar, using your Google Sheet.
- Operational metrics and alerts for runtime, error rate, and source counts.
Tip: If strict compliance matters, agree on frequency and format with site owners. Sometimes they provide partner solutions.
⚠️ Attention: Don’t use automation to bypass technical protections, don’t employ CAPTCHA-solving services, and don’t impersonate real users. This violates rules and may have legal consequences.
Tip: Store all configs in a configs folder and version them so you know when and why parsing rules changed.
FAQ
- How often should I run monitoring? Answer: start hourly, then tune to your needs without overloading sites.
- What if status only appears in a dynamic block? Answer: if there’s no public, permitted way to get it, skip the source.
- Can I capture prices too? Answer: yes, if it doesn’t violate site rules. Add price selectors and extra columns.
- Do I need a dedicated server? Answer: no, you can run on your computer. For stability and uptime, a server or cloud is better.
- How do I ensure I’m compliant? Answer: check robots.txt and terms, and avoid any protection bypass. Be transparent.
- What if the sheet hits limits? Answer: archive old rows to another sheet or CSV and keep only recent weeks in the main sheet.
- How do I add a new site? Answer: add a row to sources.csv, extend keyword dictionaries if needed, and verify status is available without login.
- Can I use a proxy? Answer: yes—only for stability and business requirements, not to evade restrictions. Configure a single approved proxy in .env.
- How do I catch overnight failures? Answer: send a daily summary and alert if the error rate exceeds a threshold.
- What time format should I use? Answer: store timestamps in UTC in ISO format, then convert in Google Sheets if needed.
Conclusion
You’ve built a clear, durable system to monitor competitors’ stock: a safe parser, unified data format, Telegram alerts, Google Sheets integration, and automated runs. You learned to verify source legality, respect site limits, and keep the network stable without questionable tactics. Next, expand your product list, add change analytics, set up team dashboards, and harden reliability. Act ethically and transparently—this is the foundation for long-term system stability and good relationships with site owners.
Tip: Review your source list and recognition quality monthly. A small routine now saves a lot of time later.
✅ Check: At week’s end, confirm you have regular Google Sheets entries, rare but accurate Telegram alerts, and a log file free of critical errors.