Google Ads Editor: a powerful ad editor at your disposal
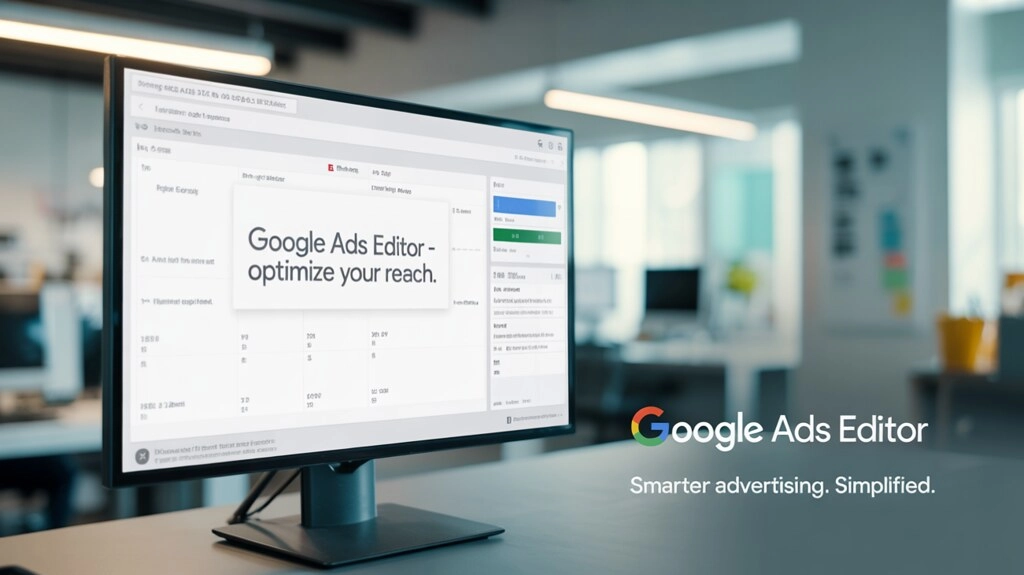
Table of contents
- Google ads editor: what kind of application is this?
- Getting to know the google ads editor interface
- Getting to know the statuses in google ads editor
- Features of filters in google ads editor
- Nuances of working with large accounts in the google ads editor application
- Basics of correct work with the latest changes
- Nuances of working with extensions in google ads editor
- Let's sum it up
Google is one of the most popular search engines today. In particular, it accounts for over 60% of all global traffic. Contextual advertising is also very actively developed here. Statistics show that about 30% of all users who get to the search results page click on such ads. This means that it can rightfully be called one of the most effective, powerful and reliable marketing tools, though if used correctly.
One of the most convenient and effective tools for placing contextual advertising both in Google search results and on third-party sites that have partnerships with the media network will be the Google AdWords service or as it is also commonly called Google Ads. Marketers love this tool for its simple and intuitive interface, a huge variety of functions that allow you to launch truly effective and effective advertising campaigns promoting products, services, and brands.
But today's review will be devoted not to this service, but to an additional application, in particular, Google Ads Editor. This is what will provide more convenient and flexible management of advertising campaigns, will allow you to make mass changes to them as quickly as possible and without much effort. Now we will dwell in more detail on what this product is, what advantages and disadvantages it has. Let's get acquainted in detail with the interface, statuses. Consider the filters that exist here, the features of their use. We will pay special attention to working with large accounts, with extensions in Google Ads Editor. The information provided will help you navigate the features of this tool, as well as learn how to use it in practice.
Google Ads Editor: what kind of application is this?
Google Ads Editor is an advertising editor in the service of the same name. It is a free official application from Google Corporation, available for installation on absolutely any personal computer, regardless of what operating system they are running. With its help, you can set up effective work with advertising campaigns in offline mode. All tasks related to making adjustments to an existing strategy will be solved as quickly and simply as possible and, importantly, en masse, ultimately saving time and effort of specialists.
Those who have already encountered this application in practice agree that Google Ads Editor is a universal tool that can be used when working with diverse campaigns. It is enough to simply pay a little attention to getting to know it. And the first thing we will start with is getting acquainted with the advantages and disadvantages of this solution.
Strengths and weaknesses of Google Ads Editor
To assess the prospects of using Google Ads Editor in your practice, it is initially important to assess the main advantages characteristic of this application. Here they are quite impressive, namely:
- Independence from the Internet connection. We have already mentioned that this program works in offline mode. This means that in order to download data from your Google Ads account to Editor, as well as upload it back after making the appropriate adjustments, you still need to be connected to the network. But direct work with advertising campaigns will be carried out locally on your computer. This advantage will be especially significant for users who have strict limits on Internet traffic, interruptions in the network.
- The presence of built-in error protection. Google Ads Editor allows you to undo all the changes that were made but did not give the desired result or, on the contrary, caused an error. If you see that something is going wrong, you can always return to the initial stage. The final changes to the advertising strategy will be made only after you click the "Publish changes" button. Until this moment, all adjustments will be localized on your personal computer and in the Google Ads Editor program, in particular.
- Good speed of work. This is a direct result of offline operation of this software product, as well as a special hierarchy. It turns out that here the application does not need to waste time loading all the tabs, waiting for switching between different sections. In just an hour of work in Google Ads Editor, you can create up to 60 different advertising campaigns - and these are figures confirmed by practice.
- The presence of so-called “special rules”. Here we are talking about current standards and requirements, following which you will not be able to upload an advertising campaign to the publication if it misses critical settings for subsequent functioning. This option will also attract the attention of specialists to the most common mistakes, errors, which will subsequently be identified by the Google search engine algorithms and impose appropriate sanctions on your ad. That is, Google Ads Editor will significantly simplify the work of specialists and minimize the likelihood of errors.
- The ability to make mass changes. In this application, you can simultaneously adjust dozens of different advertising campaigns. As an option, change the titles in a large number of ads, add new descriptions, adjust prices, if they were specified. And all this can be done in a matter of minutes and with just a few clicks.
But, no matter how impressive the advantages of Google Ads Editor are, there are still a number of disadvantages that must be taken into account before starting work. In particular, one of the most significant limitations today is the inability to work with product lists within the framework of fairly new Performance Max campaigns. But it is impossible to say that such a problem will not be eliminated in the foreseeable future, since the application updates are released regularly and there is a possibility that such functionality will be implemented in the nearest one.
Also, the weaknesses here include the sufficiently limited statistical data that is used during the analysis of the effectiveness of advertising campaigns. But here the problem is in the very essence of the application. The developers created it for optimization and editing of ads, while direct analysis was not related to the key tasks. But why do you need all this if you have an online Google Ads interface or Google Analytics 4 at your disposal. But for obtaining basic information here there are enough opportunities. To find the necessary options, you need to go to the "Manage" section, and then select the "Overview" tab.
The last point that I would like to draw your attention to in this block is the need to constantly receive the so-called latest changes. If you do not provide for this, make a mistake in your work, then you can simply demolish the entire advertising campaign that other specialists worked on in one click. We will pay more attention to this issue later, but for now we will only note that before publishing, you always need to receive the latest changes. Thanks to this, you will always have an up-to-date version of the advertising campaign. But it is clearly not worth saying that this is a drawback of Google Ads Editor. This is a technical feature that beginners often forget about. But after they've re-created all the settings for their ad campaign a couple of times, literally from scratch, they'll never forget to get the latest changes before saving the changes.
Getting to Know the Google Ads Editor Interface
We have already noted the simplicity and intuitiveness of the Google Ads Editor application interface among the advantages. This means that you can start working with it as quickly and easily as possible. A personal Google account is used to connect. To help you navigate the location of the main elements, pay attention to the picture.

The main elements are indicated with numbers on it, namely:
- Application menu. If you are working from devices on the Windows operating system, it will be located at the top of the Google Ads editor. Mac OS users will find the application menu slightly higher, literally at the very top of the working window.
- Toolbar. It is also located at the top of the Google Ads Editor. On this panel, you will find all the buttons that will help you open an account, add a new one, download the latest changes, edit and publish them. Also here you will find tools for viewing the general statistics of your account in the Google Ads service.
- Account tree. By viewing it, you can select and find accounts, individual advertising campaigns or ad groups that require adjustments or a more detailed study. Pay attention to the arrow located next to the name of the account or individual campaign. If you click on it, you can expand this view, and then collapse it back.
- Control panel. It is intended for selecting an individual campaign or ad group for viewing, searching for the necessary information. Alternatively, if you select a particular advertising campaign in the tree view, and then click on it, then here in the control panel, when you click the "Keywords" button, when viewing data, you will get a list of keywords that were used within this ad.
- View data. Go here to see the full contents of your account, ad group or individual advertising campaign. When viewing data, you will only see the parameters that you selected earlier at the tree view stage, as well as in the type lists.
- Editing panel. Here you can make adjustments to the line that was currently selected by you when viewing data. If necessary, you can also do this work by entering information from the keyboard. If you click on the icon with the image of an arrow in a square, the editing panel will open in front of you. It is presented as a floating window. If necessary, you can change the size of the panel yourself, adding the number of visible columns when viewing data.
As you can see, there is nothing complicated or too hidden here. It is enough to run the work at least once to see how simple and convenient Google Ads Editor is.
Getting to know the statuses in Google Ads Editor
To understand in more detail how to work with the Google Ads Editor application, you need to thoroughly understand such a question as statuses. All the necessary information is presented in the account tree, located at the top of the left vertical menu. Here you should pay attention to the different colors and boldness of the fonts used when writing the name. They will indicate what changes were made to your advertising campaigns or ad groups, their current status. So, the possible options:
- Normal black font. Indicates that this advertising campaign is currently active and has not had any changes made to it.
- Bold black font. This highlighting will indicate an active advertising campaign, within the framework of which adjustments have been made to one of its objects.
- Normal gray font. Indicates an inactive advertising campaign (temporarily disabled), to which no changes have been made.
- Bold gray font. This highlighting will indicate an inactive advertising campaign, to which some of its objects have been previously changed.
If you click on the name of a particular advertising campaign, to which changes have been made previously, then the ad groups that have been adjusted will open in the window on the right. If you scroll down a bit and reach the “Manage” panel, you will see the elements that you have been working on. Please note that the list of possible standard elements in this panel is quite impressive. To simplify your work and remove third-party objects, leaving only those that you used when working with this advertising campaign, you need to use the “Hyde empty types” option.
We have already briefly mentioned above that one of the really convenient and useful options in Google Ads Editor is the ability to undo actions taken. This is relevant for cases when you have made certain adjustments, but realized that you made a mistake. Until your changes are published, you can undo them. To do this, you can use the “Back” arrow directly from the toolbar or press the Ctrl+Z key combination on the keyboard. The application allows you to go back an unlimited number of actions. But if you are working with several advertising campaigns at the same time, but want to remove the changes in only one of them, then use the “Revert with all included items” option.
To make it clearer how this mechanism works, let's look at a simple example. Let's assume that you initially made an adjustment to a search advertising campaign, and then worked with display ads. Now you decide that you need to cancel the actions that were performed in the search campaign. If in this case you click on the back arrow or press the Ctrl+Z key combination, the application will initially cancel all the changes that you made to display ads, and only then return to advertising. But if you decide to use the “Revert with all included items” option, you will be able to cancel the actions in the search advertising campaign, saving all the new settings that were made in the media one.
Features of filters in Google Ads Editor
To find the information you need in Google Ads Editor, especially when working with a large number of advertising campaigns, ad groups, specialists have to spend quite a lot of time. In order to optimize such costs, speed up the solution of the tasks, the developers have provided a set of filters. Let's consider the features of their work using an example. Let's assume that you are faced with the task of finding mentions of a specific model of a women's dress at various levels of an advertising campaign. To implement this task, you need to do the following:
- Enter the actual dress model in the search bar. Here, you should use the part that will be unique to the clothes you have chosen. Let's say you are interested in a summer midi dress with short sleeves "palm print". If you enter the phrase "summer midi dress with short sleeves", then with a high degree of probability there will be a lot of such mentions and not all of them will relate to the one you need. But if you specify the phrase "palm print", then the system will definitely find the dress you need. It is also permissible to work with articles here, if you have them. It is not recommended to enter the entire phrase, since there is a chance of missing the desired object due to differences in spelling. Perhaps, in some ads, other spaces, hyphens, underscores, or other elements were used in the model name that change the product name for the application.
- Now, after entering the phrase, press the Enter button. This will give Google Ads Editor a command to automatically apply the “any” rule, that is, “anything”. The application will search for all fields where the phrase you specified was used.
- Go down to the “Manage” panel. Here we are interested in the line that indicates the value “>0”. That is, you select the ad object that contains mentions of your dress model. This is where you will need to make the appropriate changes. Alternatively, if this model is already sold out and new deliveries are not expected in the foreseeable future, then you can simply remove it from impressions. To do this, change the status from current to «Paused».
As you can see, you haven't done anything complicated, but you've saved a ton of time on manually reviewing all running ad campaigns and individual items on your account. It's literally a couple of minutes compared to several hours of routine and monotonous work to identify the necessary mention. Another small piece of advice: don't delete certain items even if you think they're no longer relevant. Pause them. Perhaps your supplier will decide to return the palm print dress in the next batch, and it will appear in your catalog again. In this case, you will only need to reactivate this object in your advertising campaigns, and not start all the work from scratch.
Nuances of working with large accounts in the Google Ads Editor application
If your Google Ads account contains a huge amount of data, then it is recommended to add only selected advertising campaigns to the Editor. Otherwise, you can overload your own computer. If several specialists will work in the same account at the same time, then it is better for you to upload to the application only those ads where you plan to make changes at the moment. This way you will minimize the likelihood of errors and eliminate accidental adjustments to other advertising campaigns. At least these recommendations should be followed by beginners.
If you find yourself in a situation where you have to work with a large number of advertising campaigns, that is, Google Ads Editor is still overloaded, then use additional filters in the account tree. Here you can build a sequence of their display, which will simplify the work and visual perception. To do this, you will need to click on the icon with the image of 3 dots in the upper right menu, and then from the drop-down list select those types of advertising campaigns or individual ad groups that you currently need visible, and hide the rest.
The tips are simple, but by following them, you can significantly simplify your work with large amounts of data.
Basics of correct work with the latest changes
At the beginning of our review, where we considered the shortcomings of the Google Ads Editor application, we talked about the fact that there is a certain specificity in making changes. This is especially true for cases when several specialists are working on the same project in one account. Let's say that yesterday evening your colleague made certain changes to a specific advertisement. You don't know about it, and in the morning you open the same campaign and start making your adjustments. As a result, after you save the changes, all the work done by your colleague in the evening is simply not saved, and your latest version is published. That is, in order to organize correct work with Google Ads Editor, you need to get the latest changes every time before starting work. To do this, you need to click on the "Get recent changes" button. You need to do this every time and take this rule as a basis. Understand, this is the only way to avoid excessive time and nerves on repeating all the work.
Let's repeat that in this case we are dealing with an offline editor. That is, Editor will save changes on your computer, and all the information in the advertising account on the Google Ads platform will remain the same until you download the changes back, that is, click the "Post" button after completing all the work. It is in your interests not to forget to click the "Get recent changes" button to regularly pull up the most current version of your advertising campaign and work with it.
Remember: Google Ads Editor does not synchronize data on its own. In the understanding of this application, the person who last performed the work will be the one in charge of the project. And if you have to erase all the data entered by another specialist, the program will do it instantly, without even asking additional questions. Therefore, we strongly recommend that you click the "Get recent changes" button every time you start working with the application. And it does not matter whether a day, half an hour of a lunch break or 5 minutes of a coffee break have passed since your last visit. All changes will become relevant in the Google Ads account only after the last user publishes them.
Why do we focus so much on this point? The fact is that in practice, a large number of specialists often work with the same advertising accounts or ads. And if you do not constantly click the "Get recent changes" button, then you will simply erase everything that they did in this application on their computer. This is exactly the problem that is leading when working with the Google Ads Editor application. In practice, situations often arise when an advertising campaign is literally reassembled from scratch from screenshots only because one of the specialists accidentally did not click on this button and did not make the latest changes.
Do not allow such oversights. It is in your interests to form a habit of receiving the latest changes every time you start working with Google Ads Editor. Literally a couple of days, and you will start doing all this automatically. After that, you will not have to worry about accidentally deleting someone else's important information.
Nuances of working with extensions in Google Ads Editor
Working with extensions is another point that in practice is associated with fairly frequent mistakes on the part of novice marketers. Here we are talking about such information in advertisements as additional links, logos, descriptions, headings. To create a new extension, you need to go down to the "Manage" panel, select the "Shared library" tab, then "Asset library", and then click on the "Sitelinks" option. Here we click on the "+Add sitelinks" button and enter the necessary information.
Now you need to add the extension you just created to Google Ads Editor. To do this, you need to go to your account tree, and then select the ad group you need or a separate advertising campaign. Now in the “Managed” panel, we go down almost to the very bottom to the “Asset library” level and here we click on the “+Add sitelinks” button. After that, we select at what level you need to add this extension, as an option for the entire account, a separate advertising campaign or an ad group.
Can something go wrong when working with Google Ads Editor?
Despite the fact that the Google Ads Editor application is distinguished by its increased simplicity in terms of interface and work for users, you can still encounter a number of problems. And this is more likely not at the stage of creating and adding extensions, but directly in the process of their subsequent editing, deletion. But now we will tell you how to do it correctly in order to minimize errors and mistakes.
The simplest solution, according to many experts, is to simply go to the “Managed” menu, find the extension you need, and then make the appropriate changes in the “Asset library”. But, alas, this does not work in practice. The fact is that if you perform such actions, then all the adjustments you make will automatically apply to all the extensions that you have added to other active advertising campaigns. That is, editing in this way is absolutely forbidden.
To better understand the logic of the relationship here, let's slightly visualize this process. Let's assume that our Asset library, that is, a library of objects, is a kind of box to which we add all the extensions we create. This box has separate shelves - advertising campaigns. That is, each specific extension will be stored on the corresponding shelf in the advertising campaign for which it was created. But at the same time, your extension is still in one big box, that is, in the object library. It turns out that if you make changes directly at the ad level, this will affect all extensions in your object library, which will also affect the products placed here on other shelves.
But what should you do if you need to edit a specific extension within a separate advertising campaign? In this case, the adjustment method described above does not suit you. Here you will need to go directly to the ad group level or a separate advertising campaign, and then simply delete your old extension. That is, you go to your box and remove a specific extension from the desired shelf without affecting the neighboring shelves. After that, you need to create a new object in the library and then add it back to the appropriate level.
There are also some nuances in Google Ads Editor when deleting extensions or pausing them. If you delete a specific extension that is relevant for the entire advertising campaign, it will also be removed from absolutely all your ad groups. Likewise, if you decide to delete an extension added to your account level, it will be removed not only from a specific advertising campaign, but also from all other ads that were created within this account. This means that you should not make any sudden moves, because if you are careless, you can literally demolish the entire advertising campaign, and end up having to restore it literally piece by piece.
And here a completely natural question arises: is it possible to understand which advertising campaigns a particular extension is associated with? It is really relevant in the context of the fact that a large number of specialists work with the same account in reality, and each of them performs different types of work. To find out the relevant information, you need to go to the object library, and then use the filter and sort all the advertising campaigns with it, ultimately choosing the one that uses the extension you need. You can find the relevant information in the library. Pay attention to the "Associations" column. In it, you will find how many times the object you selected is used in the account as a whole. Now think about whether it is possible to remove the corresponding extension from absolutely all of your campaigns?
Let's sum it up
Google Ads Editor is a really useful, and in many cases even irreplaceable tool in the work of a modern marketer. You just need to learn how to use it as correctly as possible. And the information that we provided in today's review will certainly be of great help in this. You will see for yourself how effectively you can optimize both the creation process itself and subsequent adjustments to advertising campaigns in the Google Ads service. Thanks to a well-thought-out filter system, you can quickly find the necessary ads and change certain parameters in them. Such work can be performed either separately for each ad or en masse for fairly large groups.
But with all this, it is important not to forget that Google Ads Editor is a desktop application in which automatic synchronization cannot be implemented. This means that you need to update the changes you've made every time before starting work, because this is the only way you won't delete the work of other specialists who are working on the same project as you.
It's also important to remember that working with advertising campaigns in general involves a huge amount of work, from finding the most effective strategies to launching through different channels. And here, you can't do without solutions that can automate the work and minimize the likelihood of blocking. In order not to risk stability and functionality when solving daily tasks, it will be useful for modern marketers to connect mobile proxies from the MobileProxy.Space service to work. Such an intermediary server will replace the real IP-address and geolocation of your device with its own technical parameters, while ensuring high security and protection from unauthorized access, confidentiality of work on the network, bypassing regional blocking.
With such a reliable assistant, your work on the Internet and with the Google Ads advertising account, in particular, will be as convenient, flexible and functional as possible. We suggest you get to know more about these mobile proxies here. You can also take advantage of free product testing, and if necessary, contact the 24-hour technical support service for competent advice and professional assistance.